What Is A Windows Module Installer?
Computers are everywhere and I mean everywhere. But this incredible piece of machinery comes with its fair share of pros and cons.
If you have been working on your laptop or computer for a long period and you hear the fan of the processing unit speed up and feel the temperature of the machine rising for no reason in particular, then you may need to open the task manager of your device where you might see the “windows modules installer worker” using a lot of disk and CPU resources.
For those of you who are still confused about what a windows modules installer worker is and what this process is about, hear me out.
This process is known as the TIWorker.exe and it is a part of the windows operating system. Let us take a deeper look as to what a windows modules installer worker is.
In a nutshell, it enables installation, modification, and removal of windows updates along with storage components. This process simply installs updates in the background. But make note of the fact that if you uninstall or remove an application from your device, the TiWorker.exe will also have to do its share of work.
In case you ever think that this process is taking a toll on the CPU, it may be because Microsoft releases updates on the second Tuesday of every month. So it may not seem like a lot but the installer is doing a lot of work in the background while you are out there doing your work.
Why Does It Use So Much CPU?
While the occasional high usage from the windows module installer is quite normal as far as windows 10 is considered. The good thing about this is if you leave it be for some time and let it finish, it will disappear from the running processes section of the windows task manager.
The main question is when will it disappear. To be fairly honest, it simply depends on the number of updates that are to be installed and the speed of your CPU along with the storage.
Should The Windows Module Installer Service Be Disabled?
While most people will tell you to disable it to solve the problem, that will only add to your worries as disabling it will prevent the windows from installing the updates properly.
Some people may also recommend you to set your network connection to metered which will simply stop the windows installer module worker for windows 10 from downloading and installing several updates on its own.
Although this may stop the windows module installer from activating, it will also prevent your computer from installing important security updates that protect your device from malware. This can lead to the loss of data and information so it is advisable for you to not move forward with this plan as it is quite dangerous.
The best way for you to get rid of all this is if you just leave the process on its own. Once you install the update manually, the windows module installer worker process will run once you are done with the manual method.
This is the only safe and secure way in which you can proceed as it is the way things get done when it comes to windows.
Is It A Threat For My System Or Is It A Virus?
This process is completely safe and is even part of windows itself which explains why it cannot be a virus or malware. However, even though there are no such reports of malware disguising itself as a windows module installer worker, one can never be too careful.
If you are a bit concerned about the security of the system, you can simply run a routine detailed scan to check if there are any threats.
Basic Troubleshooting Guide For The Windows Module Installer Worker
In case you think that there is something wrong with the process, be it the frequent running of this process in the task manager or the high usage of CPU by this process, you can try to fix it using some simple steps.
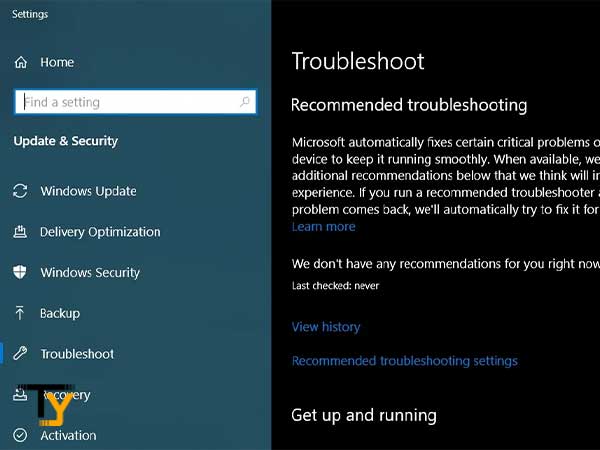
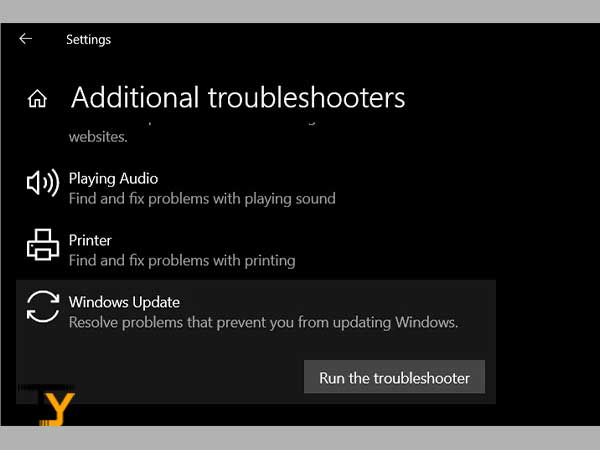
You can direct yourself to the windows update troubleshooter as this can fix the errors of windows updates that can cause serious damage. All you have to do is to open the settings>update and security>troubleshoot>windows update>run the troubleshooter. You can apply any of the changes that the troubleshooter suggests.
In the case the basic method does not help, you might want to check for missing or corrupted files with the help of a premium scanning tool. Make sure that everything is running how it is supposed to be.
If it all falls, you can always go for the factory reset and start from the beginning.
In case you want to look for more permanent options to get rid of the issues that this installer causes, we have listed some of the best ways to fix the high CPU usage issue for your Windows operating system.
Method 1: Remove the SoftwareDistribution Folder
You will need to begin by deleting a specific folder by the name of software distribution, to begin with, the troubleshooting, to begin with. This folder is used to store new updates by default. If a corrupt file gets stored here, then it can lead to several errors with the Windows Modules Installer Worker.
There are no downsides to deleting the folder as Windows 10 will automatically generate a fresh folder with the same name as soon as a new update is found. Here are the steps that one can use to get rid of this folder with relative ease.
Keep in mind to temporarily disable the Windows Update service before carrying out these steps
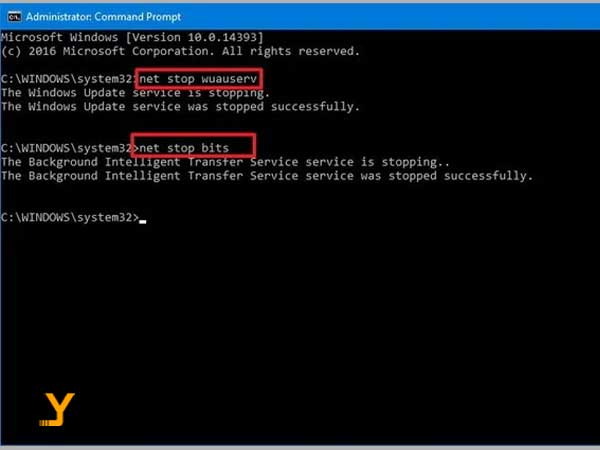
- Open the run utility by clicking the Windows+R keys on your keyboard.
- in the dialogue box, type “services.MSc” minus the quotation marks and click on ok to open up the services window.
- Next, locate yourself to the Windows update service. Simply right-click on it to select stop/pause.
- Now, use the file explorer and navigate to C:Windows to proceed further.
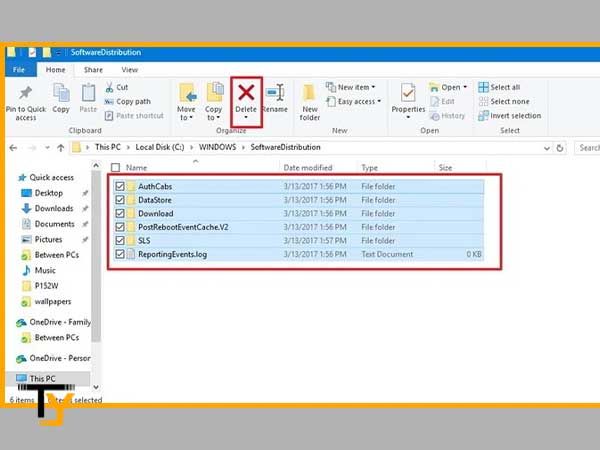
- Now, select the software distribution folder from there and right-click on it to click on the delete option from the menu that appears.
Try to restart your device and check to see if the Windows Modules Installer Worker has been fixed or not.
Method 2: Restart the Windows Update Service
There might be a possibility that the Windows Modules Installer Worker has been consuming a lot of resources because the service update is not running properly. You can check this and fix it with the use of these simple steps given below;
- Bring up the run function similarly to the earlier method by clicking on Windows+R keys on your keyboard.
- From there, “services.MSc” and click on ok to launch the preferred services. This can take a moment or two to load.
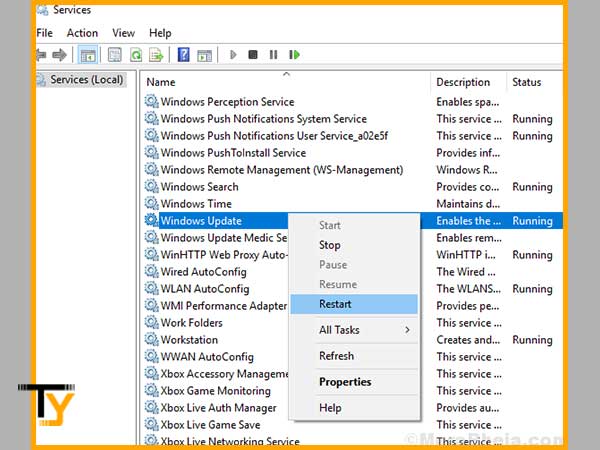
- Next, you will need to locate and right-click on the Windows Update service to select the stop option. Once you have done this, wait for 30 seconds.
- Next, right-click on the Windows update service again and simply click on start. This will fully restart the device.
Method 3: Use the Windows Update Troubleshooter
A specific tool is issued by Microsoft themselves that can help the users to fix issues regarding the Windows updates. Anyone can download the tool as it is available for free, irrespective of whether or not one has a Microsoft account.
Simply begin by running the tool to see if it can identify any errors and fix them. Use the steps given below to know how to do so;
- First off, you will need to download the Windows update troubleshooter. You can download it directly from the official website of Microsoft for free.
- After this, open the WindowsUpdate.diagcab that you have just downloaded by double-clicking on it to launch the troubleshooter window.
- For the next step, simply follow the instructions given on the screen. If the troubleshooter can identify errors of any sort, you need to click on them to either get information about the issue or to fix it automatically.
Notes
Keep in mind that the windows update troubleshooter is not flawless. if for some reason, the tool is unable to find any errors, you need to make sure to continue with the process until you can find something that can help you in fixing this error.
Method 4: Run the system file checker (SFC scan)
This is a default tool in Windows 10 and generally goes by the name of SFC scan. This tool is deemed by many as the quickest way that one can use to automatically fix corrupted system files along with other issues.
Many of the users have reported that this tool can simply fix the Windows modules Installer Worker high CPU usage issue from happening again. Given below are the steps that one can use to execute this process.
- First off, press the Windows+R keys on your keyboard to bring up the Run utility, to begin with.
- in that box, you will need to enter “cmd” and then press ctrl+shift+enter keys on your keyboard to proceed further. Once you have done this, it will launch the command prompt with the administrative permissions.
- If needed, tap on yes to allow the command prompt so you can make changes on the device.
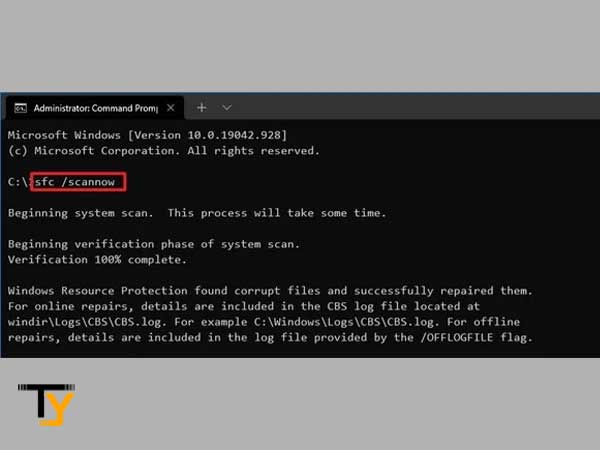
- Next, you will need to type “SFC/scannow” in the command prompt and then click on enter to execute the command.
- you will now need to wait for a few minutes while the scan is ongoing and repairing your corrupt files. This may take some time which is why you need to make sure that you do not close the command prompt or turn off your computer system.
- Next, simply restart your device once the scan is complete.
Method 5: Use the DISM Command
A brilliant tool that allows you to find and fix the corruption issues of your system with the use of the command prompt application to run simple commands. The tool carries out a system-wide scan and checks for corruption and then attempts to restore the missing and damaged files automatically.
Let us take a look at the steps that one can use to make good use of this tool
- To begin with, hit the Windows+R keys on your keyboard to open up the run utility of your system.
- Similar to other methods, type “cmd” and then click ctrl+shift+enter keys simultaneously on your keyboard to launch the command prompt with administrative permissions.
- Next, if needed, hit yes to allow the command prompt to make changes on your device.
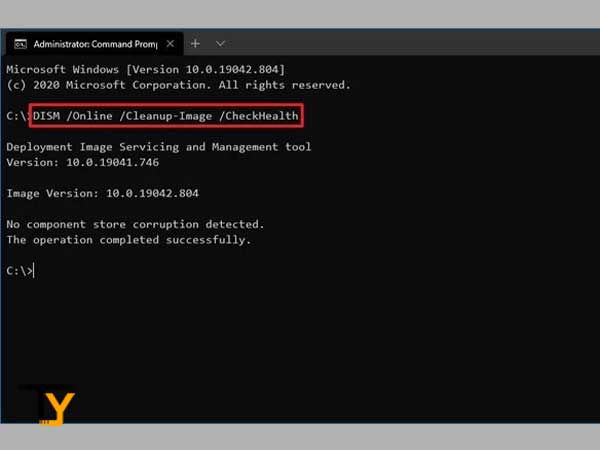
- Now, from the command prompt, you will need to start the DISM scan to look for system-wide issues and enter this command, “DISM.exe/online/cleanup-image/scanhealth and hit enter to execute this program.
- After the process is complete, simply close the command prompt and restart your device to finish.
These are some of the best possible methods that one can use to fix the Windows modules installer worker high CPU usage with relative ease.
Conclusion
The Windows Modules Installer Worker issue can seriously affect the performance of the system. The methods given above can help a user to simply fix this error without much trouble if for some reason the normal troubleshooting is not getting the job done for you.