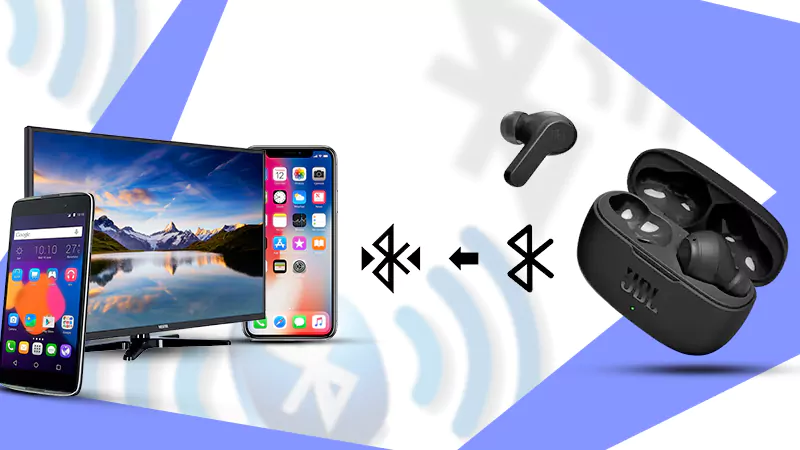
You plug in your headphones into the jack, insert the pods in your ears, lean back in the chair and hit the play button. But wait, what? The music is blasting through the computer’s speakers and not through your ear pods. That wasn’t supposed to happen! You fumble with the mouse and keyboard and hit ‘stop’ before you try to figure out what went wrong.
Why are your headphones not working? And then you notice that your headphones aren’t even showing up in playback devices, and that could be the reason you are getting no sound on YouTube.
Well, that’s quite a common error faced by Windows 10 users.
And trust me, most of the time, you can easily fix this problem without the need to buy another pair of headphones.
Here, we’ve compiled a step-by-step guide for you to fix headphones not showing up in playback devices.
Step 1 – Rule out Any Hardware Problem
First and foremost, you need to cross out the possibility of a hardware problem.
There can be a problem in one of these:
- Your headphones
- Your computer’s jack
To rule out jack issues, insert the headphones in some other jack on the computer. If they work, the problem is probably due to the other jack, which needs to be fixed.
To rule out any issues with the headphones, connect the headphones with some other device like another laptop or phone and see if they work. If they aren’t working on another device as well, the problem is probably due to the headphone being faulty, in which case you’ll need to fix them or get a new pair.
If the headphones are working fine on another device, you probably messed up some sound settings on your computer. Read on to find how to spot the problem and fix it.
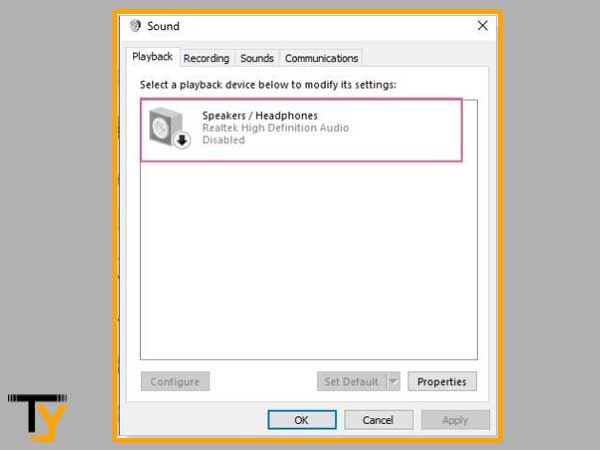
Step 2 – Make Sure Your Headphones aren’t Disabled on Your Computer
Many Windows 10 users find their headphones automatically disabled, which can obviously cause the issue.
To make sure your headphones aren’t disabled,
- Open the Playback Devices window. (Click the volume icon on the bottom-right of the desktop screen and choose Playback Devices).
- Now, right click anywhere on this window and check the Show Disabled Devices option.
If your headphones were previously disabled, they’ll now appear on this screen. You can just right-click and enable them.
Step 3 – Get Rid of Realtek HD Sound Software
You shouldn’t really be getting rid of this software, as it’s actually a great audio manager. However, many users have reported that uninstalling this software fixed the problem for them. Hence, it’s worth trying out.
- Open Control Panel and click ‘Uninstall a Program’ under Programs section.
- Here you’ll spot Realtek HD Sound in the list of programs. Select it and hit the ‘uninstall’ button.
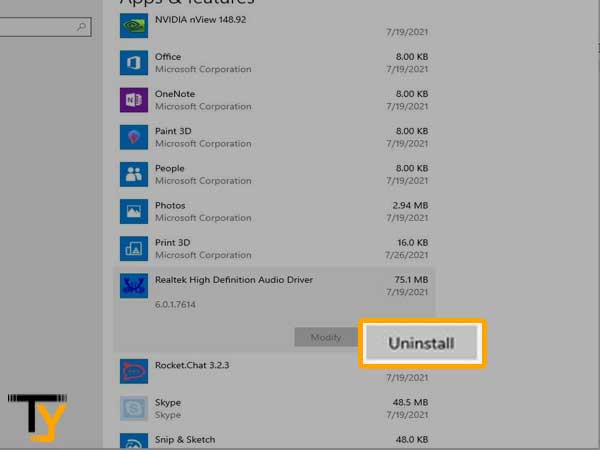
See if the problem is resolved. If it does, you can even go back and install the software again and see if the problem comes back.
Step 4 – Update the Device Drivers
If none of the above methods resolved the problem for you, the next step is to try updating the drivers for this device.
Device drivers often become corrupt, causing problems with hardware. To fix the issue, you need to uninstall the current drivers and reinstall them.
- Open the start menu and search for Device Manager in the search bar; click to open the Device Manager screen.
- Here, scroll down to the Sound, Video and Game Controllers tab and expand it.
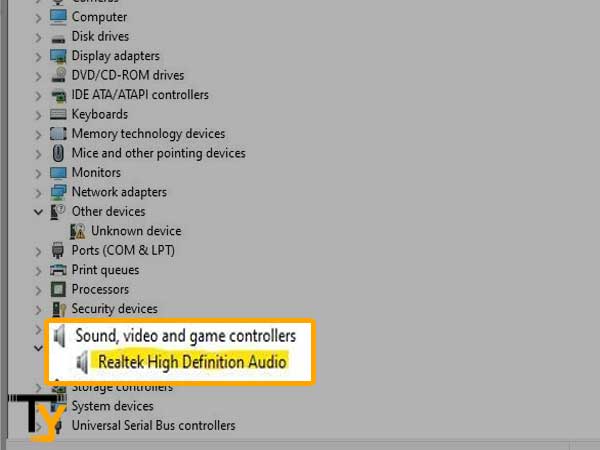
- You’ll see your headphones appearing here in the list. Right-click and choose Update Driver from the menu.
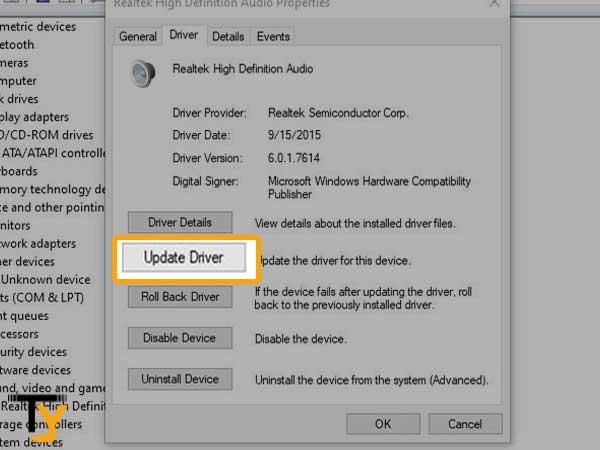
- On the next window, choose the “Search automatically for updated driver software” option. The utility will find a newer driver for the device.
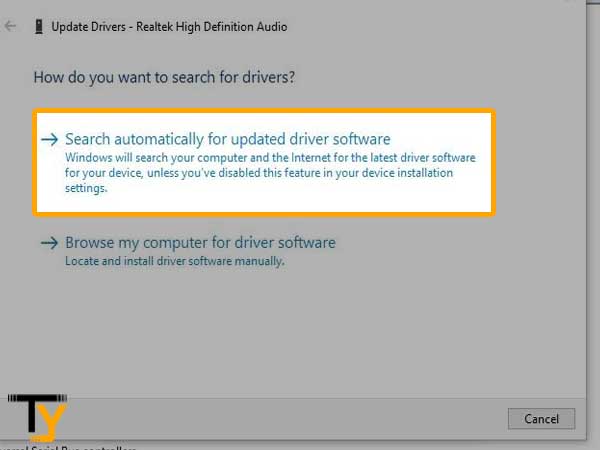
Now, check if the problem is resolved and your headphones are appearing in Playback Devices.
Step 5 – Use the Built-in Audio Troubleshooter
If nothing else worked, try the Audio Troubleshooter built in Windows.
- Open Settings from the Start menu and click to open Update and Security.
- Now, click the ‘Troubleshoot’ option on the left. On the right, you’ll see the option of Playing Audio under the ‘Get Up and Running’ section.
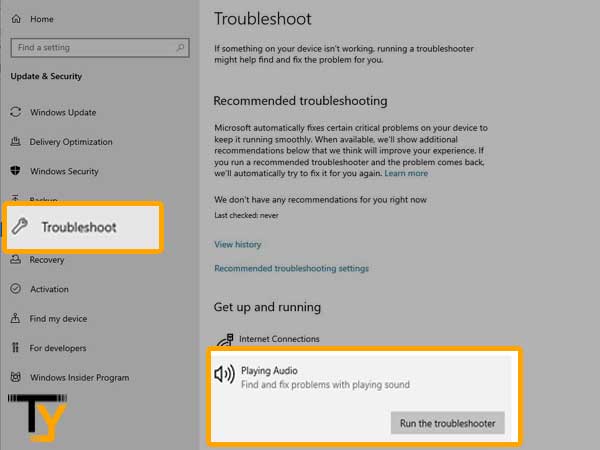
- Click to open the Audio Troubleshooter and follow the instructions on the screen.
Your problem must be resolved now. Check to see if your headphones are showing up in Playback Devices now.
Lean back in your chair and enjoy!