- Method-1: Restart Windows Explorer
- Method-2: Disable Internet Explorer 11
- Method-3: Use Component Services
- Method-4: Set Edge as the Default Browser
- Method-5: Execute System File Check (SFC) and DISM Scan
- Method-6: Run the Internet Explorer ETW Collector Service
- Method-7: Disable iCloud on Your Windows System
- Method-8: Restore the System to the Previous Restoration Point
- Method-9: Reset Default Apps To Microsoft Recommended
- Method-10: Again Register the ExplorerFrame.dll File
- Method-11: Make Another Local Administrator Account
- Method-12: Check Your Hard Drive
- Method-13: Last Resort– Reset Windows
“How to fix the explorer.exe class not registered error?”
“What are the ways that can be used to repair the ‘explorer.exe class not registered’ issue in Windows 10?”
“Can the‘ explorer.exe class not registered’ issue be fixed?”
The internet is flooded with such questions. Thousands of people are searching for ways to fix this ‘explorer.exe class not registered’ issue in Windows 10 as well as Windows 11.
But before moving to the solutions, it’s necessary to find out the cause of this issue. Yet again, there is no solid reason for the occurrence of this problem, but the most reasonable explanation for this situation is as follows:
The emergence of this issue, according to the error message, implies that the system files (DLL files) linked with explorer.exe have gotten damaged or have gone missing. Dynamic-link Library (DLL) files, often known as shared libraries, are required for all Windows programs to function properly. These files are incredibly useful to users since they can operate on less memory and can complete their functions without needing to be loaded wholly at the instance. Thus, if these files are damaged or missing, then it is most likely that you will be displayed with the ‘explorer.exe class is not registered’ message.
Seems like huge damage, right? But, don’t you worry, listed further in the article are some methods that have helped Windows users resolve this issue in the past. So, let’s get going!
Method-1: Restart Windows Explorer
Restarting Windows Explorer is the easiest and the most basic workaround if you are getting the ‘explorer.exe class is not registered’ message. Restarting it would help reload all its components and basic programs, and thus might eliminate the problem triggering it.
Listed below are the steps to be followed:
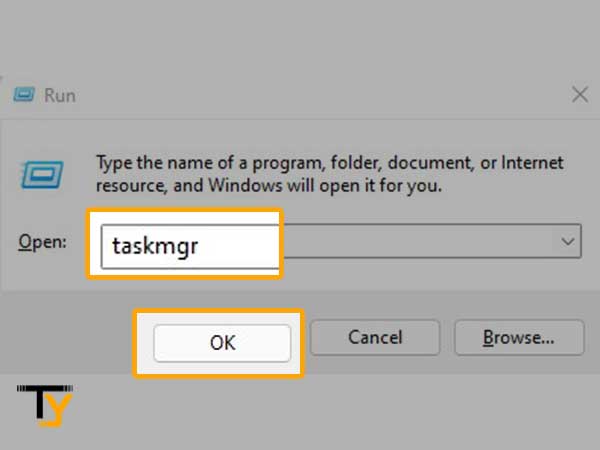
- First, press the Windows logo key + R from the keyboard at the same time to open the Run window.
- Inside it, type ‘taskmgr’ and hit Enter from the keyboard or click OK.
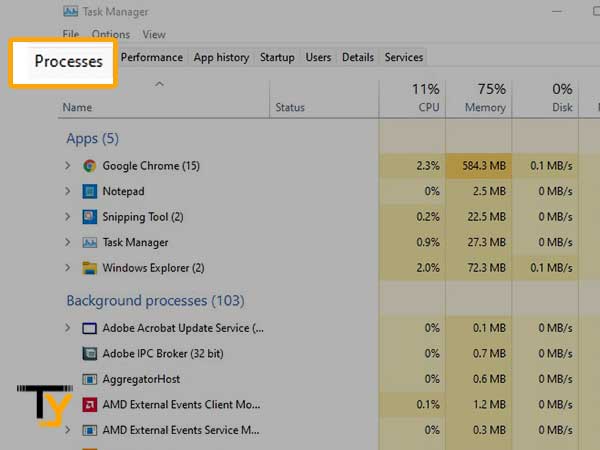
- Thereafter, your system’s task manager window will open up. There, switch to the Process tab.
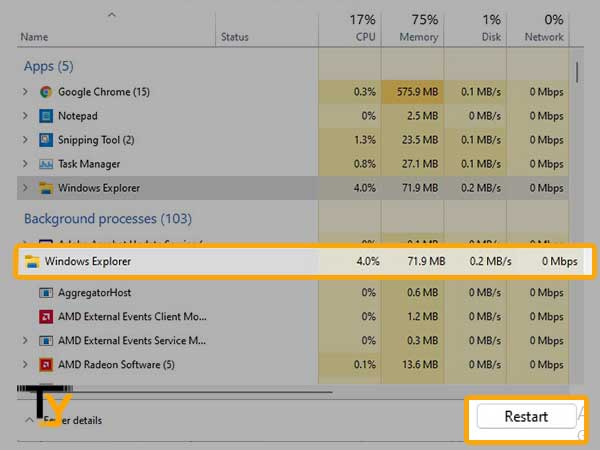
- Now, locate Windows Explorer under the Apps list, and select it. Afterward, click on the Restart button in the bottom right corner of the screen.
Method-2: Disable Internet Explorer 11
Disabling Explorer 11 is another option that has fixed the issue of the explorer.exe class because of which the Start button or the entire screen stopped working. Additionally, you will be required to have administrator access to the system to conduct this solution, and your computer may take some time to initialize some services and apps on your next boot. So, be patient and let Windows do its thing.
Here are the steps for disabling Internet Explorer 11:
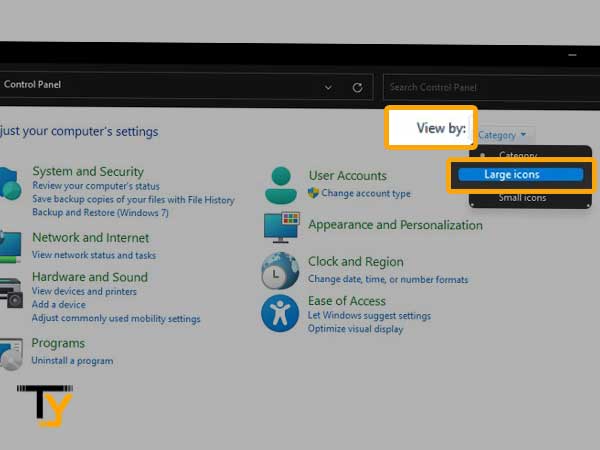
- To begin with, open the Control Panel on your system.
- Once the Control Panel is opened, click on the drop-down menu of the View by option present in the top right corner of the screen, and select the Large Icon option.
- Thereafter, the configuration of the Control Panel window will change, and then you have to select the Programs and Features option.
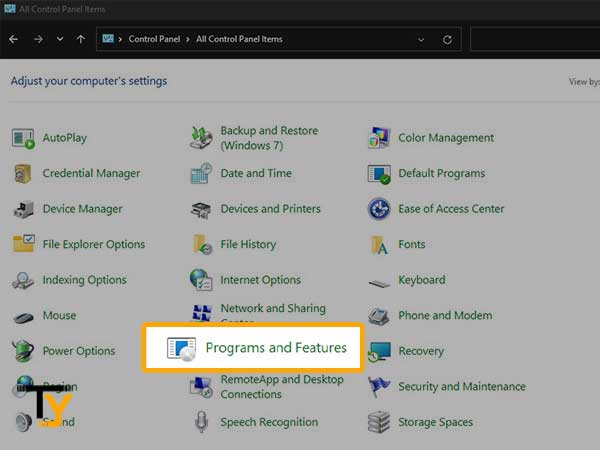
- From the left side pane of the next screen, select the Turn Windows Features On or Off option.
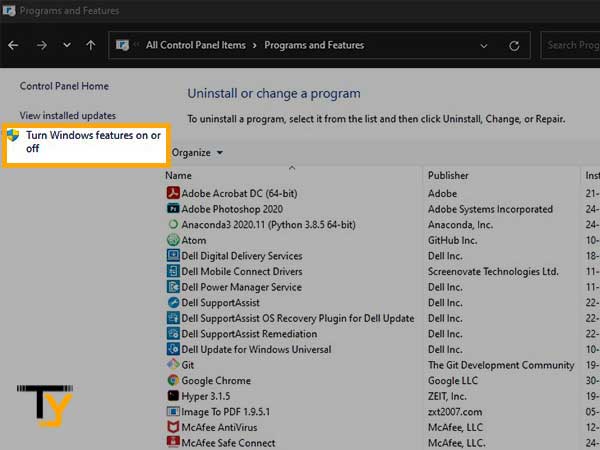
- Now, locate Internet Explorer 11 and uncheck it and click on the OK button. Then, a warning window will appear, click Yes on it.
- At last, restart your computer and wait for its rebooting.
Method-3: Use Component Services
Modifying specific settings in Component Services can repair the ‘explorer.exe class not registered’ issue in Windows 10 as well as Windows 11. To do so, the following are the steps to undergo:
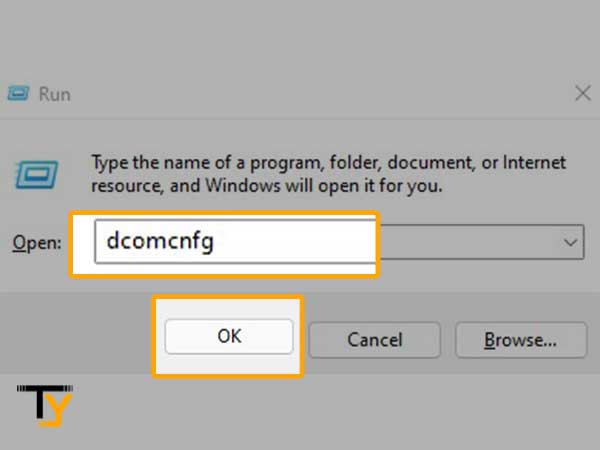
- To begin with, press the Windows logo key + R key from the keyboard at the same time.
- Inside the text box of the small Run window, type dcomcnfg and click on the OK button.
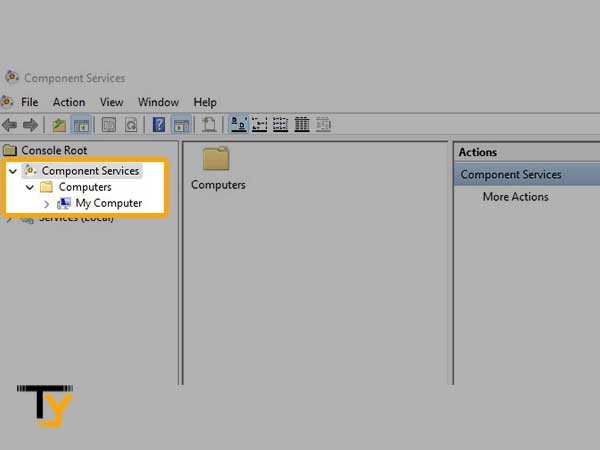
- Next, the Component Services window will open, in which you have to expand the folder named Component Services.
- From the expanded folder, click on Computer and then select My Computer.
- Double-click on the DCOM Config folder present inside the My Computer folder.
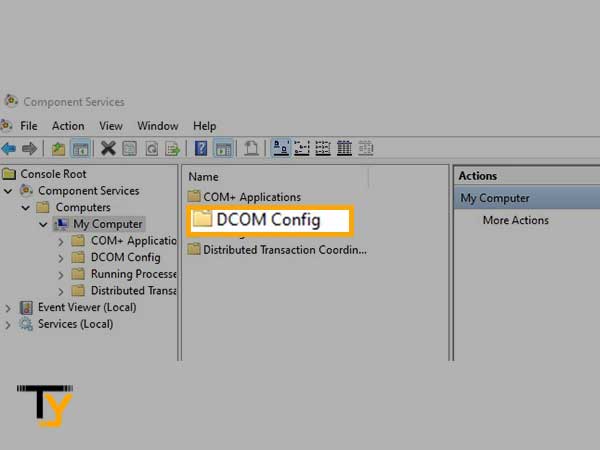
- Double-click on the DCOM Config folder present inside the My Computer folder.
- Thereafter, a few warning messages may appear, click Yes on each of them.
- Lastly, close the window and restart your PC.
Method-4: Set Edge as the Default Browser
If you are still getting the message that your explorer.exe class is not registered, then another thing you can do is to set Edge as your default browser. The majority of users have another browser installed (such as Chrome), but what Microsoft recommends is the Edge browser. Thus, you can try setting MS Edge as your default browser. If this doesn’t work for you, you can always undo the adjustments following the same process.
Stated below are the steps to be followed:
- First, press Windows + S key at the same time, type the control panel in the search box and open the first search result.
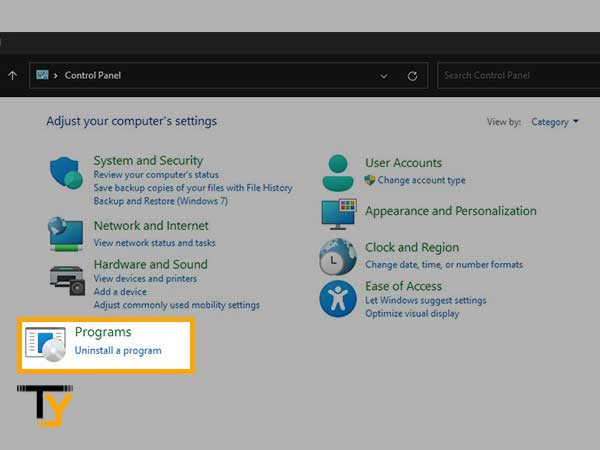
- Then, the Control Panel window will open, in which you have to click on the Programs option.
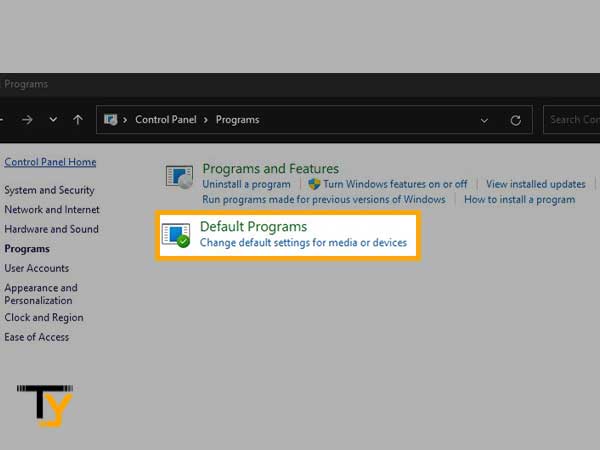
- Thereafter, select the Default Programs option from the next screen.
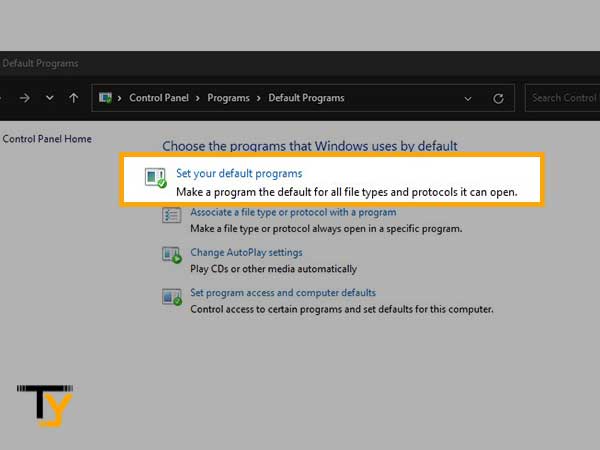
- Next, click on the Set Your Default Programs option.
- Now, look for Microsoft Edge in the Programs/Apps list and select it. Then, select the Select This Program As Default option.
- Lastly, click on the OK button and the changes will be saved.
Method-5: Execute System File Check (SFC) and DISM Scan
System File Check (SFC) is a well known Windows scan that finds the damaged system files (which can be the potential reason for explorer.exe not being registered), and replaces them with the correct files present in the previous cache of the system, or download them from the internet.
It is a very important tool for diagnosing problems and determining whether they are caused by corrupt files in Windows. Stated below are the steps to run the SFC scan:
- In the search box of your system, type the command prompt.
- From the results, click on the Run as Administrator option to open the command prompt as administrator.
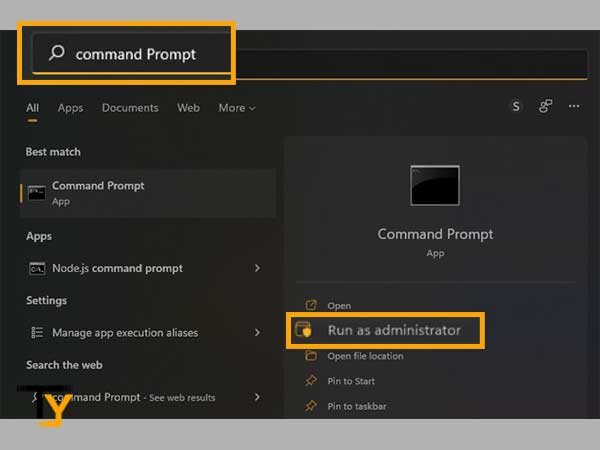
- Now, click on the Yes button to give permission for opening the command prompt.
- Once it opens, type “sfc /scannow” (write the command with no quotation marks and put a space between sfc and /) and hit Enter from the keyboard.
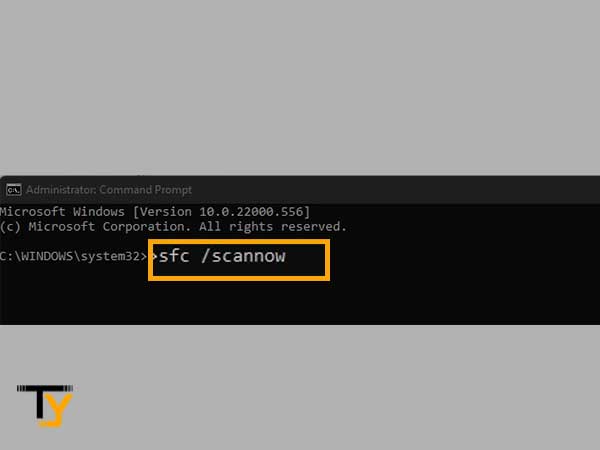
- Thereafter, the scanning of system files will start and damaged files will be replaced, which can repair the ‘explorer.exe class not registered’ issue in Windows 11 and 10.
However, if there are corrupted files, but SFC is unable to replace them with the correct ones, then you will be required to run the DISM scan. Following are the steps for doing so:
- Open the command prompt as administrator as stated in the above steps.
- Inside the command prompt, type in the command stated below and hit Enter afterwards:
- DISM.exe /Online /Cleanup-image /Restorehealth
- It will take some time for the command to complete the scan. Once it is done, again run the sfc /scannow command and hit Enter.
- After the SFC scan is done, it will show you the status of the scan, and any damaged system file will get repaired, eliminating the issue of the explorer.exe class not being registered.
Method-6: Run the Internet Explorer ETW Collector Service
If you are still using Internet Explorer as your browser, then the explorer.exe class not being registered might appear if Internet Explorer ETW Collector Service is stopped or not running. To ensure that it’s running, and to start it again if it is stopped, follow the steps listed below:
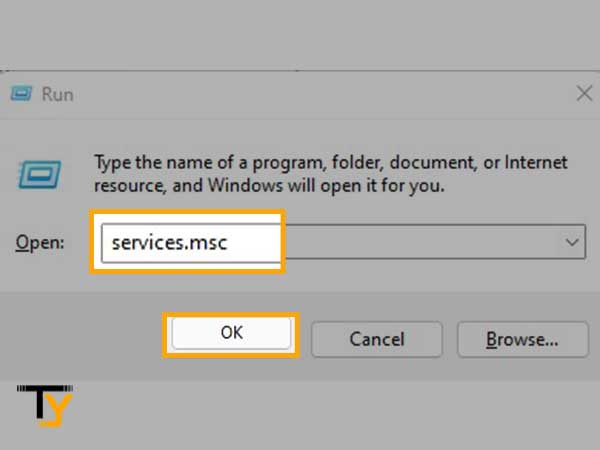
- From the keyboard, press the Windows logo key + R at the same time.
- Type services.msc inside the Run window that opens and click on the OK button.
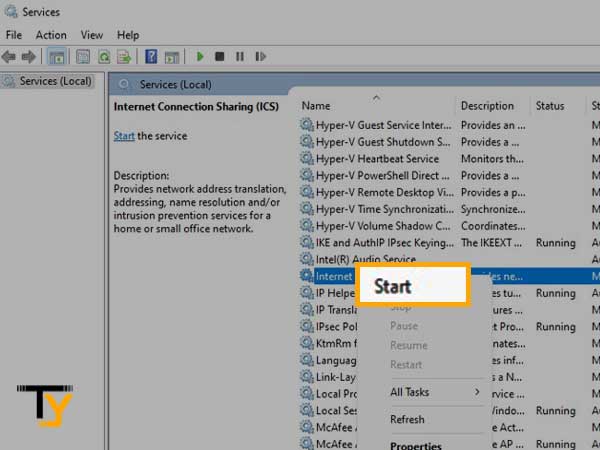
- Then, under the list of services, locate the Internet Explorer ETW Collector service, and check its status. If it’s running, then you need not do anything. However, if it is stopped, then right-click on the service and click on the Start option.
- Thereafter, open the Task Manager and go to its Details tab.
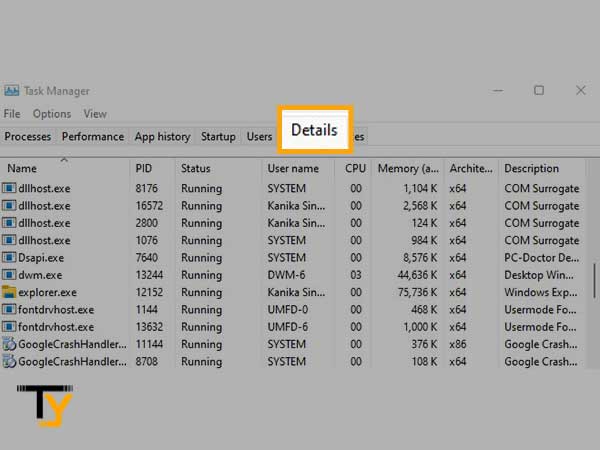
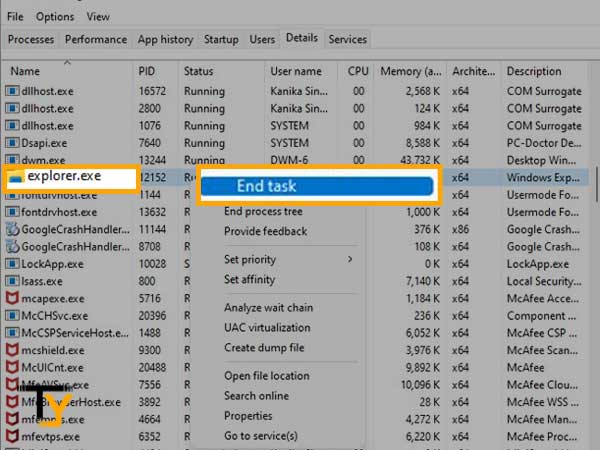
- Inside the Details tab, locate the explorer.exe file and right-click on it. From the menu that appears, select the End Task option.
- Then, click on the File option from the top right corner of the Task Manager window, and click on the Run New Task option.
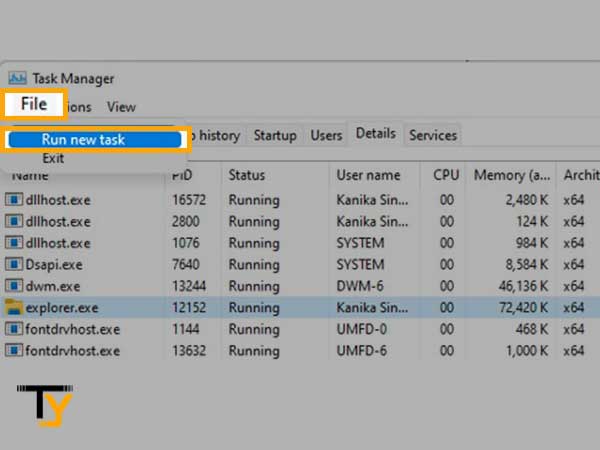
- Lastly, inside the Create New Task box, type explorer and click OK.
Method-7: Disable iCloud on Your Windows System
Disabling iCloud might seem irrelevant and insignificant in resolving the issue when you get the message that your explorer.exe class is not registered.
But, trust me on this, I have gone through several blogs and forums where the method is known to work for many.
So, if you have iCloud logged in on your Windows system, then try to disable it and see if the problem still exists. The steps for doing so, are listed below:
Disabling iCloud from Startup:
- Press the Windows logo key + R from the keyboard at once.
- Inside the text box of the Run window, type taskmgr and click on the OK button.
- In the task manager window, switch to the Startup tab.
- Look for iCloud in the apps list and right-click on it. Then, from the expanded menu, click on the Disable option.
- Once you have disabled iCloud, restart your PC and see if it is still showing the ‘explorer.exe class is not registered’ message.
Disabling iCloud Process:
- From the keyboard, press Ctrl + Shift + Esc at the same time. It will open up the Task Manager window.
- Under the Process tab of the Task Manager, locate the iCloud name.
- Right-click on it and, from the expanded menu, select the End Task option.
Method-8: Restore the System to the Previous Restoration Point
If you have taken a backup of your system in the past, then you can restore your computer to that point. This can help with the ‘explorer.exe class not being registered’ issue. This is because, when the system is restored to a previous point, all its files, programs, features, etc. get replaced by the ones that were there earlier. So, whatever caused the explorer.exe issue will also get eliminated, and thus you won’t face the problem again.
Here are the steps that you need to follow:
- In the search box of your Windows, type restore and click on the Create a restore point, from the search list.
- Thereafter, from the window that opens, click on the System Restore button present under the System Protection tab.
- A new screen will appear, where you have to click on the Next button and follow some on-screen instructions.
- The above step will take you to the screen where all your restore points will be listed. Select the most recent one of them.
- Next, Windows will ask you to confirm your action. So, click on the Yes button on the small pop-up window, and the restoration will start.
- Once your computer is restored, sign into it and see if the issue is fixed.
Method-9: Reset Default Apps To Microsoft Recommended
If any of the above methods hasn’t fixed your problem, it’s possible that the ‘explorer.exe class not registered’ error is caused by another problematic application that has been selected as the default program for some file type. You may repair this issue by resetting all of your Windows default programs to the original apps suggested by Microsoft. To complete this task, follow the procedure outlined below:
- Click on the Start button from the taskbar and click on the Settings icon present just above the power button.
- From the Settings window, select the Apps option.
- Now, click on the Default Apps option from the left sidebar of the next screen.
- Thereafter, the Default Apps list will appear. Scroll to the bottom of the page, and you will see the Reset to the Microsoft Recommended Defaults section, along with a Reset button. Click on that button, and the MS recommended apps will be restored.
Method-10: Again Register the ExplorerFrame.dll File
Many of the resources, like bitmaps, menus, icons, etc., utilized by explorer.exe are included in the file explorerframe.dll. If this file is not registered (due to a software bug) or becomes corrupted, it might result in the current explorer.exe problem. In such a situation, re-registering ExplorerFrame.dll may resolve the issue.
- In the search box of the system, type command prompt, and select the Run As Administrator option to open the command prompt.
- Click on the Yes button, if a window asking permission to do so pops up.
- Thereafter, inside the command prompt, type in the following command and press Enter key:
- Regsvr32 ExplorerFrame.dll
- Then, restart your system, and see if you are still getting the ‘explorer.exe class is not registered’ message.
- However, if the problem persists, then you have to copy the ExplorerFrame.dll folder from another PC that is working fine and paste it into the computer having the explorer.exe class issue. Here’s the path where you have to copy the folder:
- C:WindowsSystem32 – for 32 bits system
- C:WindowsSystemWOW64 – for 64 bit system
Method-11: Make Another Local Administrator Account
In Windows, each user account has its own set of settings and preferences for apps and other system features. If your local Windows profile/account is corrupt, this might be the cause because of which, you are displayed the ‘explorer.exe class is not registered’ message. In that situation, establish a new user profile/account and make that account the Administrator. Further, keep in mind that after doing so, the administrative control from the current account will be lost and a new user window will be formed only with files and apps that were pre-installed on the PC.
Following are the steps to make a new Windows account:
- Press the Windows logo key + I from the keyboard at the same time to open the Settings window.
- After the Settings window appears, click on the Accounts option from there.
- Then, from the left side pane of the Account settings, click on the Family & Other People option.
- Thereafter, select the Add Someone Else on This PC option from the right side of the screen.
- Next, you have to log in to the Microsoft Account in the prompted window and click on the Next button.
- Once the account will be logged in, it will ask you to choose the Account Type, in which you have to select the Administrator option.
Follow the on-screen instructions to make this account the Local Administrator and check whether the explorer.exe class is still not registered.
Method-12: Check Your Hard Drive
If your hard drive is corrupted or damaged, then it can also be one of the reasons behind the issue of the explorer.exe class not being registered. Now, you will question how would you know that your drive is corrupt? Well, to do so, a command is typed in the command prompt that shows you the status of the hard drive of your system.
Further, to do so, type the command prompt in the search box of your system, click on the Run as Administrator option, click on the Yes button to give permission to open CMD as admin, then type the following command in the CMD and hit Enter after it:
- wmic diskdrive get status
After running this command, and completing the scan, the command prompt will show you the drive status. If it turns out to be damaged, then you should get it replaced.
Method-13: Last Resort– Reset Windows
If any of the above methods weren’t able to solve the explorer.exe issue, then the last thing you can do is reset your whole system. Windows 10 provides its users with the option to reset their Windows. By resetting it, all your files, apps, drivers etc. will be deleted or removed, and a new Windows will be installed containing only the apps that came with your PC originally.
Since Windows will be installed anew, this method should be able to resolve the explorer.exe class problem, as with a new OS installation, the reason for the issue should also be eliminated.
If you have made mind to reset your Windows, then the following are the steps that you need to follow:
- Click on the Start button in the taskbar of your PC, and click on the Settings icon present above the Power button.
- From the Settings window, select the Change PC Settings option.
- Then, click on the Update and Recovery option, and then select Recovery.
- Thereafter, on the next page, under the Remove Everything and Reinstall Windows section, click on the Get Started option.
- Lastly, follow the instructions prompted on the screen and complete the reset process.
That’s all folks! Hope this article is able to help you in fixing the explorer.exe class issue.