A few days back I was in the office, and can you guess what happened! My AirPods were not connecting, neither to my iPhone nor to my Mac, and I was bored to death, as I couldn’t listen to music without disturbing others, but only till the first half of the day.
During the lunch break, I searched for various ways and methods by which I can solve my issue and connect my AirPods again to my iPhone and Mac. In the beginning, I was very flustered and wasn’t able to figure out why my AirPods are not connecting. Nevertheless, I researched, and it proved to be very fruitful, as I was able to listen to the music by again pairing these pods to my devices.
However, finding a viable solution to this issue was not easy. I went through a lot of blogs and forums, picked out some solutions that helped others and myself as well, and presented them in this article in a nice format.
Checking AirPods Compatibility with Your Device
Before you move on to the troubleshooting steps, it is necessary that you check the compatibility of your AirPods with the operating system’s (OS) version of your pairing device.
Yes, you read it right, you need to ensure whether your AirPods are compatible with the version of the OS you are using on your device. If your AirPods don’t go with the OS of the device with which you are trying it to pair, then you need to get the AirPods replaced or get the OS updated.
Listed in the table below are the different versions of AirPods and the OS of various Apple devices with which they are compatible:
| Apple Devices/ AirPods Version | iPhone/iPod Touch/iPad/ Apple TV | Apple Watch | Mac |
| Third Generation | iOS 15.1, iPadOS 15.1, tvOS 15.1 or later | watchOS 8.1 or later | macOS 12 or later |
| AirPods Pro | iOS 13.2, iPadOS 13.2, tvOS 13.2 or later | watchOS 6.1 or later | macOS 10.15.1 or later |
| Second Generation | iOS 12.2, iPadOS 12.2, tvOS 12.2 or later | watchOS 5.2 or later | macOS 10.14.4 or later |
| First Generation | iOS 10, iPadOS 10, tvOS 11 or later | watchOS 3 or later | macOS Sierra or latter |
Right Way to Connect AirPods to iPhone & Mac
Before moving to the troubleshooting methods it is necessary that you ensure that you are following the correct method to connect the AirPods with your iPhone or Mac, the steps stated below will guide you through this:
Connecting AirPods to iPhone:
- On your iPhone, go to its home screen.
- With the AirPods in their charging case, open the case lid and hold it just next to your phone, till the AirPods connecting screen appears on the phone.
- Inside the small window that will appear on the screen, tap on the Connect button.

- Next, you will see some instructions, if you have AirPods 3rd generation or AirPods Pro, which you have to read.
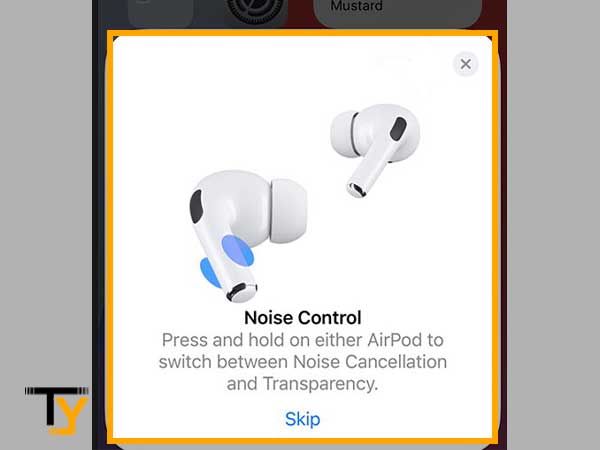
- Thereafter, you will be guided through the steps to set up Siri on your phone, if you haven’t already done that.
- Afterwards, tap on the Done button.
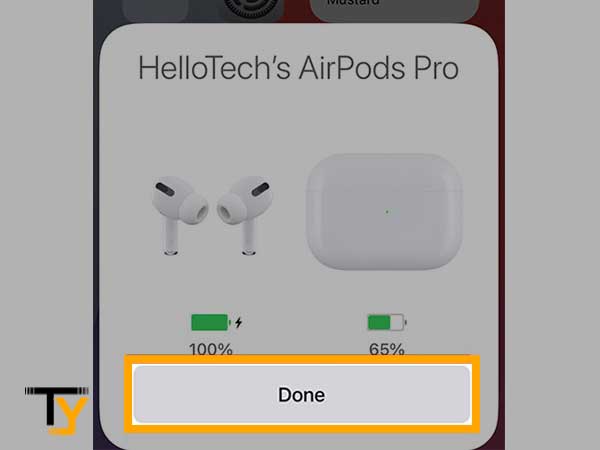
If you are signed in to your iCloud, your AirPods will automatically be connected to all the supported devices that are signed in to your iCloud with the same Apple ID.
Connecting AirPods to Mac:
- First, from the Apple menu, you have to select the System Preferences option and click on the Bluetooth option.
- Thereafter, turn the Bluetooth on.
- Now, bring the AirPods charging case near your system with both of them placed inside it, and open its lid.
- Afterwards, you have to press and hold the setup button at the back of the case, till the light flashes amber and then turns to white.
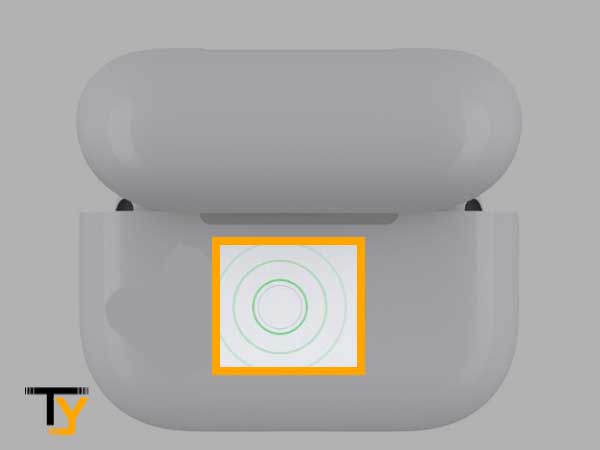
- From your Mac’s screen, under the Devices section, click on the Connect button next to your AirPods name, and the pods will be connected to your Mac.
Know the Charging Status of your AirPods
Before you proceed with the troubleshooting techniques, it is advised that you check the charging status of your AirPods, as it might be the case that your AirPods are not connecting to your iPhone or Mac because their battery is drained.
To know if your AirPods are charged or not, put them in their charging case, and the following colors of the status light will give you an idea of their charge remaining:
- If the status light is amber, then your AirPods are charged but not full.
- The white status light means that the AirPods are ready to be connected. It is not associated with battery life.
- And, if the status light flashes a green color, it means that the AirPods are fully charged.
To know how much charging is left in your AirPods precisely, the following steps can be followed:
For iPhone/iPad/iPod touch:
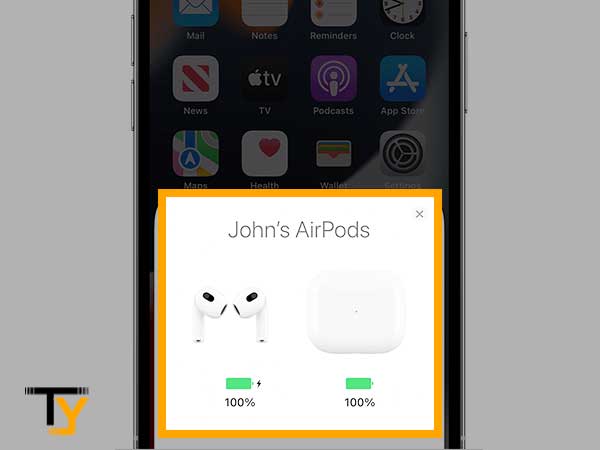
- With both the AirPods inside the case, hold it close to your device and open its lid.
- You have to maintain the position for a few seconds, and your device will itself show the percentage of charge remaining in both AirPods and their case.
Notes
The charge status of the AirPods can also be checked through the battery widget on your iPhone or iPod touch or iPad. However, for doing so, it is required that at least one of the AirPods is placed inside the case.
For Mac:
- With both the AirPods placed inside their case, hold the case close to your Mac with the lid open.
- Then, click on the Bluetooth icon in the menu bar.
- Now, hover your cursor over the AirPods name shown in the menu, and the charging of both the AirPods and their case will be displayed.
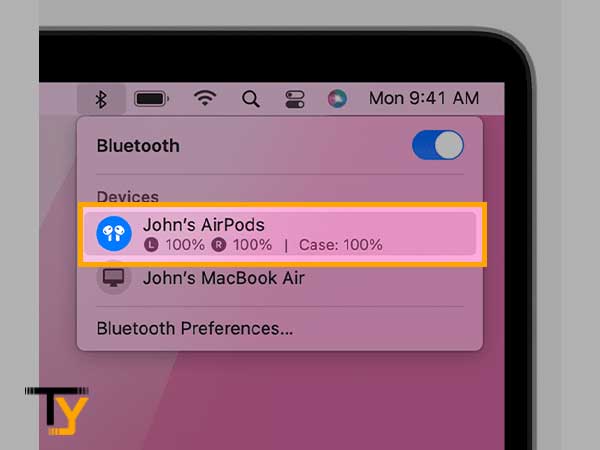
You can learn more about the AirPods battery life and its optimization for better performance by visiting the Apple Support Page.
Reset your AirPods when They Don’t Connect
If you have followed the correct method to connect your AirPods to the iPhone or Mac (as stated in the above section ‘Right way to connect AirPods to iPhone & Mac’), but still can’t connect them, then resetting the pods and again trying to connect is the most basic troubleshooting step one can take. In order to carry out this process, there are specific steps to be followed, as listed below:
For iPhone:
- To begin with, you have to put your AirPods inside their charging case and close its lid, afterwards.
- Next, you have to wait for at least 30 seconds before opening its lid.
- With the AirPods case lid open, on your iPhone, go to Settings.
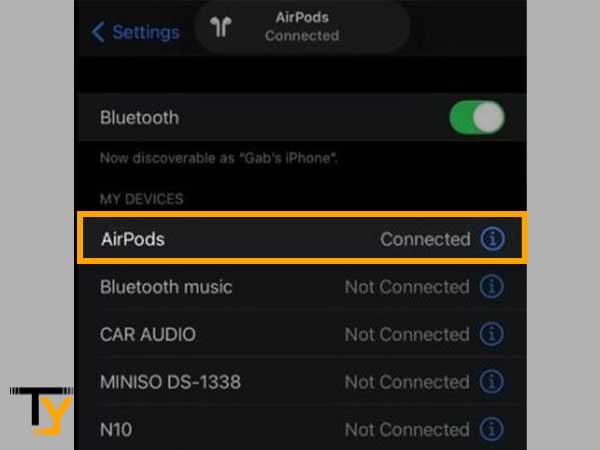
- There, tap on the Bluetooth section from Settings.
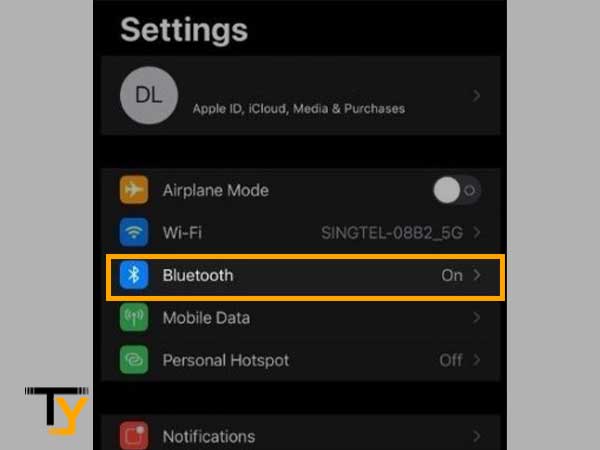
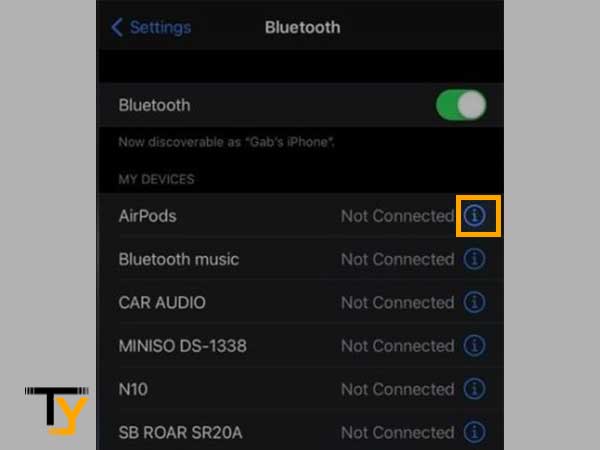
- Tap on the More info icon next to the name of your AirPods on the screen.
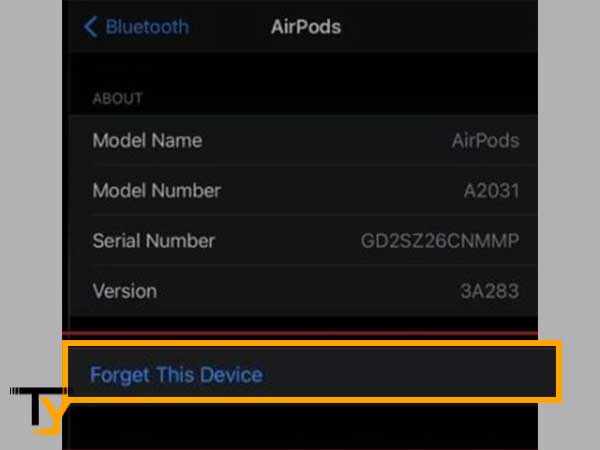
- Then, select the ‘Forget This Device’ option from the prompted screen, and again select the same option to confirm the action.
- Now, press and hold the setup button at the back of the AirPods case, with the lid still open. Hold that button for at least 15 seconds, until the amber light flashes, and then become white.
- At last, reconnect your AirPods with your iPhone by holding them close to your phone with the case’s lid open and following the steps on your phone’s screen.
For Mac:
- To begin with, put both of the AirPods inside the case, close its lid and wait for a few seconds.
- Roughly after 30 seconds, open the case’s lid.
- Now, on your Mac, go to System Preferences and click on the Bluetooth option.
- Thereafter, the list of devices connected to the Bluetooth will appear. Click on More Info, present adjacent to the AirPods name.
- From the expanded options, click on Forget This Device, and confirm your action. After this, your AirPods will be disconnected from your Mac.
- Then, press and hold the setup button at the back of the case with its lid open till you see the amber light flashing and then turning white.
- Again, bring the case (with AirPods contained in it) near your Mac and follow the on-screen steps to connect AirPods to your system.
Device-Specific Solutions: Troubleshooting Methods for iPhone
Method-1: Restart your iPhone
Now, let’s start troubleshooting your AirPods connectivity issue by restarting your phone. Restarting the phone can solve a lot of issues in the background that are not visible on the front. By rebooting the phone, all the programs and apps running in the background that might be preventing the AirPods from connecting to your iPhone get terminated and are loaded anew. This will resolve the issues and AirPods might connect to your iPhone.
Here are the steps for rebooting your iPhone:
- First, if you have an iPhone which has a Face ID, then press and hold the side button and either of the volume buttons. If you have an iPhone without a Face ID, then press and hold the power button.
- Thereafter, the ‘slide to power off’ screen will appear, in which you have to slide the red power button from left to right to turn off your phone.
- Now, you have to wait for a few seconds before turning the phone back on.
- To switch on your phone, again press and hold the side button and either of the sound buttons for iPhones with Face ID or press and hold the power button for iPhones without a Face ID.
- Release the button when the Apple logo appears, and then the phone will open itself.
Once the phone is turned on, try to reconnect your AirPods to your phone. If AirPods still won’t connect your iPhone, then move on to the next method.
Method-2: Reset Network Settings
Whenever your iPhone is connected to a Wi-Fi or a Bluetooth device for the first time, it captures its information and automatically gets connected to it every subsequent time. However, if somehow, this information got corrupted or the connection couldn’t be established properly, then you won’t be able to connect your AirPods to your iPhone. Thus, resetting the network settings of your device can be a solution.
Listed below are the steps that you can follow to reset network settings:
- On your phone’s home screen, tap on the Settings app icon to open it.
- Inside the Settings, tap on the General option.
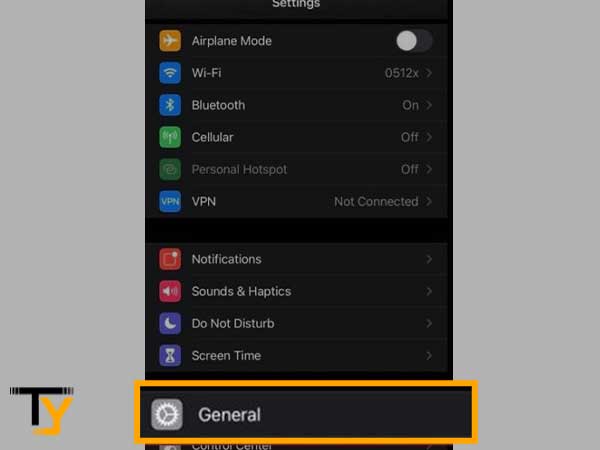
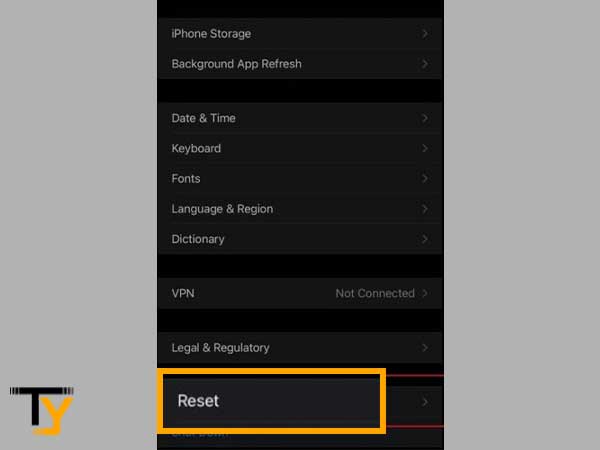
- Thereafter, scroll through the page till you locate the Reset option and tap on it.
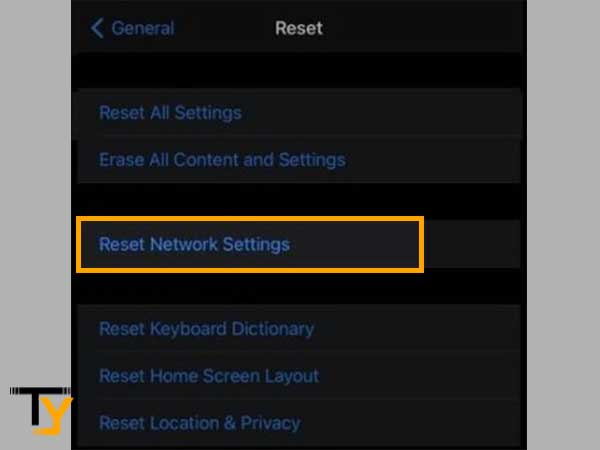
- Next, select the Reset Network Settings option.
- Enter the passcode of your phone, if prompted. Your device may turn off and restart by itself. So, be patient and let it do whatever it is doing.
Once the process is completed, you will be disconnected from your Wi-Fi and all the Bluetooth devices. For reconnecting, you have to do it manually, for each of the devices.
Now, to check if your AirPods are connecting to your iPhone and working, you have to turn your Bluetooth on and manually connect the AirPods, listed below are a few steps that will let you do it:
- On your phone, again open the Settings app.

- From the Settings page, tap on the Bluetooth section.
- Now, to turn it on, tap on the toggle button and Bluetooth will be turned on (Bluetooth is off if the toggle button is grey and is on when the toggle is green).
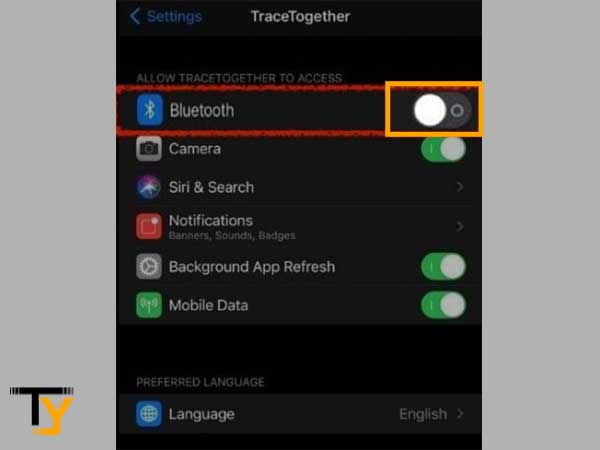
- Now, again, try to connect your AirPods by bringing them close to your Phone, and following the on-screen instructions.
Method-3: Update iPhone Software
Updating your iOS can be a solution for AirPods not connecting to your iPhone because as mentioned earlier, AirPods compatibility is device-specific. So, if you update your phone’s system, the incompatibility issue can be resolved and your AirPods might connect to your phone.
For updating iPhone system software, the following steps can be followed:
- On your phone, open the Settings app.
- Go to the General settings section.
- Select the Software Update option.
- Next, tap on the Download and Install option or Install Now, whatever you see on the screen.
- Thereafter, if prompted, you will be required to enter the passcode of your device.
- Now, your device will start updating.
Method-4: Correctly Pair Your AirPods With the Bluetooth
If you aren’t signed in to your iCloud, then you will have to pair your AirPods with your iPhone manually, every time you will be required to pair them. Also, make sure that they are paired with your phone’s Bluetooth. So, if you are hurrying without correctly pairing AirPods with your phone’s Bluetooth, then obviously they will not connect and won’t work.
Stated below are the steps to correctly pair AirPods with Bluetooth:
- First, you need to put both of the AirPods in their charging case.
- Now, hold the case close to your phone and open its lid.
- Thereafter, long-press the setup button present at the back of the charging case. When the status light turns white, the AirPods will be paired with your Bluetooth.
Method-5: Ensure Your AirPods are in Connecting Range
If your AirPods are not near your iPhone, then they obviously won’t connect. This is so because AirPods connect to your phone via Bluetooth, which has a specific range up to which the AirPods can connect or remain connected. If you are out of this range, then AirPods will not connect to your iPhone or will be disconnected, if they were previously paired.
To check if your AirPods are within the connecting range of your iPhone’s Bluetooth, the steps listed below will help you find out this:
- On your iPhone home screen, swipe up from the bottom edge, if your phone has Face ID, otherwise, swipe down from the upper right corner of the screen to open the Control Center.
- Now, look for the Audio Output button (the signal radiating icon). Tap on it.
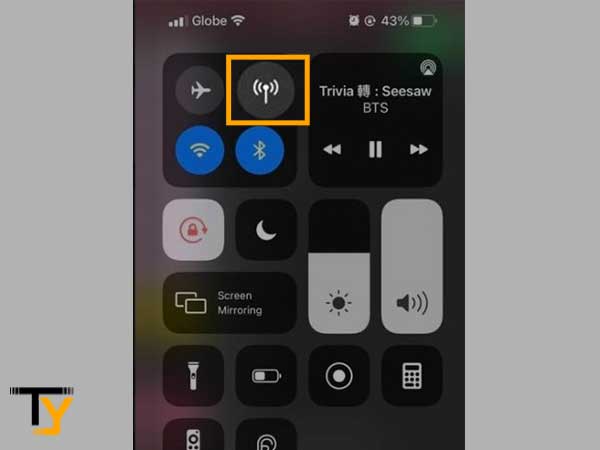
- If your AirPods are not listed under the audio output source, then they are not in connecting range. So, you have to be close to your AirPods to connect your iPhone to them.
Method-6: Ensure that Your AirPods are Connected to the Correct Device
Many times it happens that you keep on applying various troubleshooting methods on your phone to which you wanted to connect your AirPods, but couldn’t get through this because they are connected to some other device.
See, the case is, when you use your AirPods with multiple devices, and when you try to connect them with your iPhone, but some other device’s Bluetooth is already open, and it detects AirPods in connecting range, then AirPods will connect to that device automatically, and you won’t be aware of it.
With AirPods already connected to another device, they won’t pair with your iPhone, as they can be connected to only one device at a time. So, if you have other devices laid out near your AirPods, check if their Bluetooth is open and the AirPods are connected to it. If so, then turning off the Bluetooth will cut their connection, and now you will be able to pair AirPods with your iPhone.
Method-7: Check the Audio Balance of AirPods on Your Phone
Very few people are aware of the fact that they can manually alter tone and amplification settings from the Headphone Audio panel of their iPhone. If the Audio/Visual Balance of the AirPods is at its lowest level, then despite the AirPods being connected to the iPhone, you won’t be able to hear anything. This can lead you to the delusion that your AirPods are not connected to your iPhone.
To hear an audio sample with your current settings, you can tap Play Sample. You can compare these settings by changing their Balance setting while listening to the sample.
To equalize the audio level between the left and right channels of AirPods, do the following:
- First, open your phone Settings.
- Inside the Settings page, locate Accessibility and tap on its tab.
- Thereafter, select the Audio/Visual option.
- At last, on the Audio/Visual page, you will see the Balance slider, which you can adjust according to your preferences.
Device-Specific Solutions: Troubleshooting Methods for Mac
Method-1: Ensure Your Mac’s Bluetooth is Turned On
Since the AirPods are connected to the Mac, only through Bluetooth, therefore, it is an obvious and most basic troubleshooting step to check the status of Bluetooth and to resolve the issue of AirPods not connecting to Mac. To check if the Bluetooth is turned off, the following steps can be followed:
- To begin with, open the Apple Menu on your Mac.
- Then, head over to System Preferences.
- Thereafter, click on the Bluetooth option. This will expand the Bluetooth menu, in which you have to make sure that the Bluetooth status is labeled ‘On’.
Method-2: Check if AirPods is Present Under Bluetooth Device’s List & Make them Default Audio Output
When you first connect your AirPods to Mac Bluetooth, they get listed under the devices’ list of Bluetooth, which will automatically connect to your Mac when brought near it. You can check the names of the device that can connect to your Mac’s Bluetooth by following the same steps as stated in the just above section.
If you see your AirPods in the device list, make sure you’ve selected them as your audio device. However, if somehow the AirPods name is not present inside the device list, then it is the reason because of which the AirPods are not connecting to your Mac automatically when brought near it.
To add AirPods under the Bluetooth device list, you again have to follow the steps of connecting AirPods to the Mac as explained earlier.
Further, whenever you connect to your Mac, check that AirPods are marked as an active Bluetooth connected device. When you choose your AirPods, the symbol on the left will be highlighted.
Additionally, you can make AirPods your default audio output by tapping the Audio symbol in your Apple Menu bar and selecting the connected AirPods from the dropdown menu.
Method-3: Update Your Mac
If you are avoiding your Mac’s update for a long time, then it can be the reason for AirPods not connecting to it.
Previously, in the article, we have learned the importance of device compatibility with AirPods. So it becomes necessary that you keep your macOS up to date to avoid any unnecessary trouble. Thus, if an update is pending, then update your software right away.


