At first, making an eCommerce site might seem hard, especially if you’re not skilled in tech. But once you understand the basics, it’s really not that difficult. All you need is just to start using Shopify!

Shopify started back in 2006, originally for selling snowboard gear online. What was once just a website is now a full eCommerce platform that helps over $700 billion in sales happen every year.
Want to follow the millions of other stores that are already using Shopify and open your own? This guide will walk you through the process, helping you set up your own online store in 10 simple steps!
Why Choose Shopify?
With over 20% of the market, Shopify is clearly one of the best eCommerce platforms. It’s the second biggest in the world and makes it easy for newcomers to get started.
Shopify is easy to use, and there are a lot of themes and apps to choose from. However, it might take you a while to make a site that will attract and keep buyers’ attention. The success of your business depends on this investment, so it would be smart to hire a Shopify web development agency.

Many expert eCommerce developers agree that Shopify is a fantastic choice for newbies who wish to open an online store right away. But what about bigger companies? Did you know that Shopify is used by some of the biggest brand websites, like the Netflix shop, Red Bull, and Tesla?
As to 2023 reports, Shopify has over a million merchants around the world and that over 47,473 businesses use its Shopify Plus feature, designed to process more than 10,000 transactions per minute!
Finally, one of the best things about Shopify is that it is safe and reliable. Stores must keep their customers’ personal and financial information safe in today’s digital age. Shopify guarantees an uptime of 99.8% and keeps your customers’ data safe.
How to Create a Shopify Store in 10 Steps
When you build your Shopify website, one of the first things you’ll need to do is set up a store. Definitely the most significant part, but the great thing about it is that it changes all the time as you build your Shopify business.
For people who have never set up a Shopify store before, here is our 10-step guide.
Sign Up for an Account
To get started with Shopify, head over to their website and click on the “Start free trial” button.
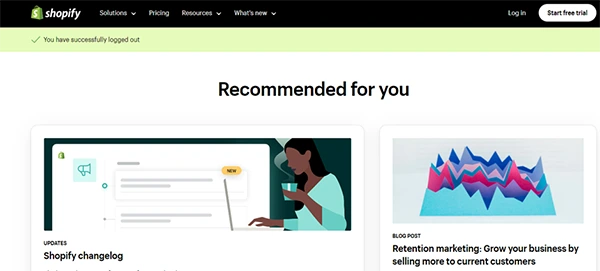
You’ll be asked a few questions, but you can skip them if you want. If not, choose the answers that best fit your business.
Once you’ve entered your email, created a password, and picked a store name, you’ll land on your admin panel. Now, you’re all set to start your four-day free trial.
Pick a Theme
When you sign up, Shopify sets a default theme. If you want to change it, head to the “Online Store” section and select “Themes.”
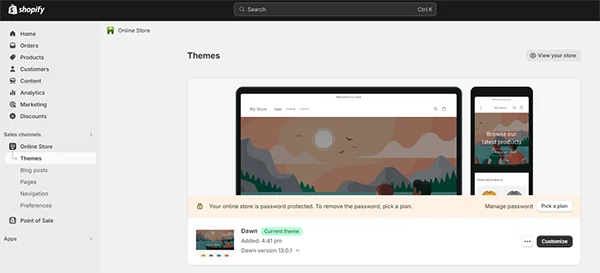
You can browse free themes in the “Popular free themes” section or explore more in the theme store.
When you find one you like, click “Add” to add it to your library. You can preview how it looks before making it live.
Add Products and Content
To add products:
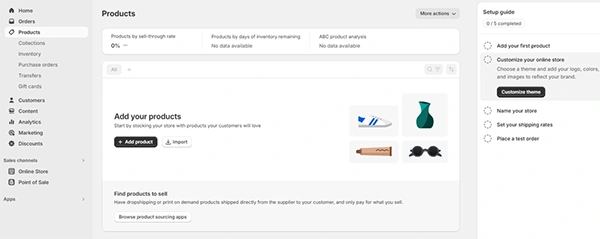
- Go to “Products” and click “Add product.”
- Enter product details and click “Save.”
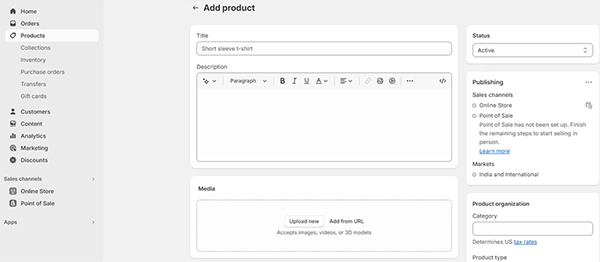
You can also duplicate or edit existing products, manage sales channels, add tags, and edit search engine listings.
Set Up Payments and Checkout
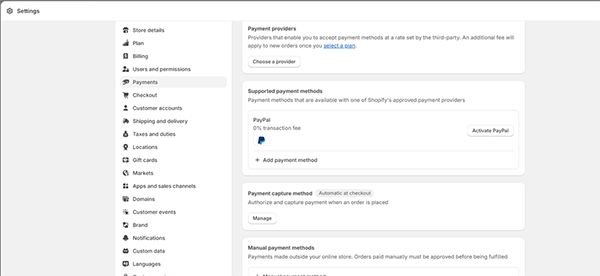
To set up payments:
- Review eligibility and activate Shopify Payments.
- Provide business and banking details.
- Set store currency and complete account setup.
You can configure payment settings and also do a test transaction to make sure everything works fine.
Create Store Pages
Do the following to add pages to your store:
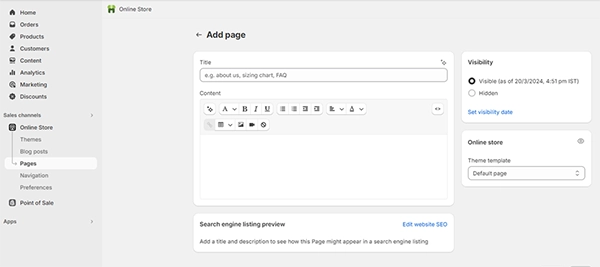
- Go to “Online Store” > “Pages” and click “Add page.”
- Enter a title and content.
- Set visibility and save the page.
You can edit existing pages and add links to your navigation menu.
Configure Shipping Rates
To set up shipping rates:
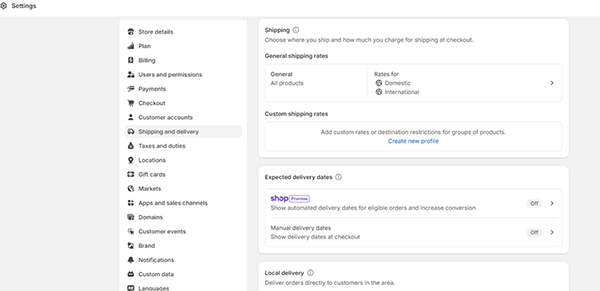
- Go to “Settings” > “Shipping and delivery” and click “Manage.”
- Add shipping rates with details and conditions.
- Adjust calculated rates if needed and save.
Make sure you check your shipping rates regularly and make changes as needed so that your customers have accurate and competitive options when they check out.
Set Up Tax Rates
Before setting up taxes:
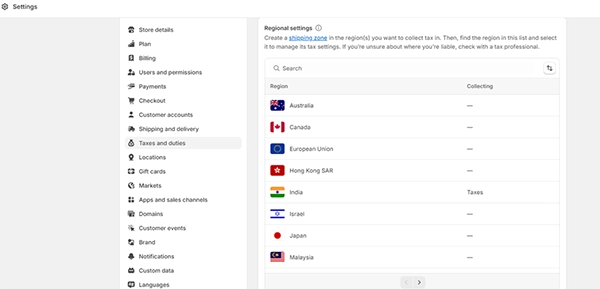
- Check if you need to charge taxes and register accordingly.
- Go to tax settings and select your region.
- Collect sales tax and provide necessary details.
You can manage tax settings and exemptions as needed.
Connect Your Domain
To connect your domain:

- Go to “Settings” > “Domains” and buy or connect your domain.
- Enter your domain name and follow the steps.
Domain verification takes 48 hours. After verification, it will appear in the Domains page’s third-party domains section as Connected.
Test Your Store
It’s best to place a test order before you open your Shopify store.
To make changes to your Shopify payments, go to Settings > Payments and click Edit. Check the box next to Use test mode, then click Save.
- Visit your web store
- Put something in your cart
- Feel free to check out as if you were a customer.
This can help make sure everything works smoothly, without real charges.
Launch Your Store
If you want everyone to be able to access your Shopify store, you need to remove the password protection:

- Remove password protection in “Online Store” > “Preferences.”
- Uncheck the option to restrict access and save.
Finally, your Shopify store is live and customers can start shopping there.
Bottom Line
Not ready to put your time and effort into making your eCommerce project work? Don’t worry – if you really want to grow your online business, working with Shopify developers is always a good idea! The only problem here is that it can be hard to find and hire skilled Shopify developers. But if you manage to find the best ones, you can expect great results like more sales, profits, and happy customers. Not sure where to find the right Shopify web development agency? DigitalSuits, a Shopify eCommerce development company, and an official Shopify Plus partner, offers a range of development services for online businesses. We’re dedicated to making a smooth, high-performing Shopify website that not only engages users, but also improves your SEO rank.


