- Method-1: Go through your archived chats
- Method-2: Download your Chat Data from Facebook
- Method-3: Recover Deleted Messages from Facebook App Cache
- Method-4: Check Email of Facebook Data Backup
- Method-5: Ask the other recipient to provide the chat backup
- Bonus Tip-1: Should You Use Third-Party Apps to Recover Deleted Messages?
- Bonus Tip-2: Take backup of your Facebook data before permanently deleting anything
Facebook has changed our lives in many good ways. It has helped us connect with our far off friends and family, grow businesses and much more. Many of us coordinate with clients, promote and manage other activities of the business through Facebook, and many others have become influencers, bringing a change in the thinking of age-old society. Therefore, the chances of having random important conversations for achieving different business and personal objectives, increases.
In such a scenario, when you have got your important chats deleted, you would have felt like the whole world is trying to drown you.
However, the days of worrying about not being able to retrieve your permanently deleted messages on Facebook Messenger are over, as this article will show you the five most effective techniques for getting out of the situation. Additionally, at the end of the article, a bonus tip has been provided, so that you never lose track of your Facebook messages and other important data. So let’s get going.
Method-1: Go through your archived chats
Before going into more advanced troubleshooting methods to recover your deleted Facebook messages, you should check for the deleted chat in the Archive section.
Many times, it happens that when you go to delete chats from your messenger, you accidentally end up pressing the Archive option instead of Delete. This is a very common mistake that people make, as both of these buttons are present close to each other and therefore chances of tapping the wrong button increases.
However, you need not worry, you can easily recover the chats from the archive. Listed down here is the method for doing so in different devices:
1. From Facebook Messenger App on Android
Here are the steps that will take you to the Archive section of your Facebook Messenger app:
- To begin with, you first have to go to the Facebook Messenger App.
- Tap on your profile picture present in the top left corner of the app screen.
- From the sidebar that appears, select the Archive Chats option.
- Thereafter, you will be directed to the Archive chats section, where all the chats you have archived to date, will be present. Now, in order to unarchive them, you have to long-press on the chat and select the Unarchive option.
2. From Facebook Messenger App on iPhone
The steps for unarchiving the chats from the Archive section of the Facebook Messenger app of iOS devices to recover deleted chats or messages, are more or less similar to those of Android, with the slightest difference, here are these:
- First, open the Facebook Messenger app.
- Tap on your profile picture, present at the top of the screen.
- Select the ‘Archive chats’ option from the sidebar that appears.
- Now, in the archived chat list, swipe the chat that you want to recover from left to right.
3. From Facebook Website on Desktop
If you are using the Facebook website on your desktop, then listed down are the steps to recover chat from the archive, which you had thought, is deleted:
- Login to your Facebook account.
- On the home page, click on the Messages icon present in the upper right corner of the screen.
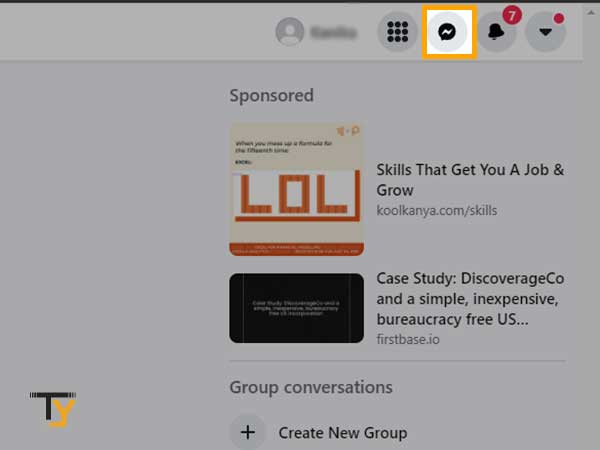
- Then, click on the See all in Messenger option.
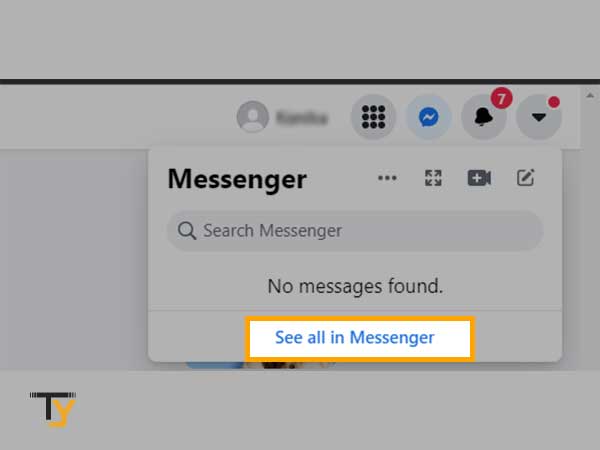
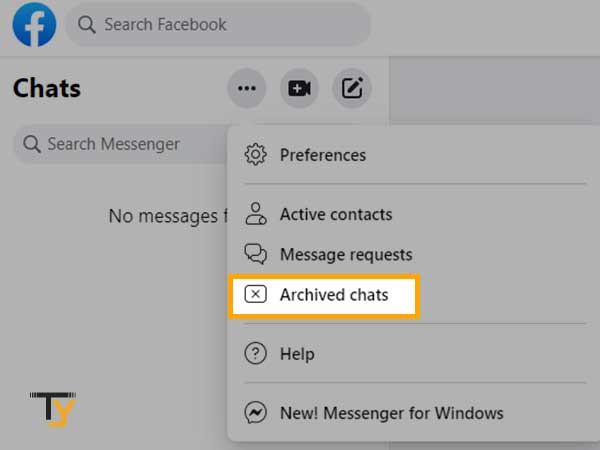
- Now, click on the More menu icon (three dots) present in the Chats section.
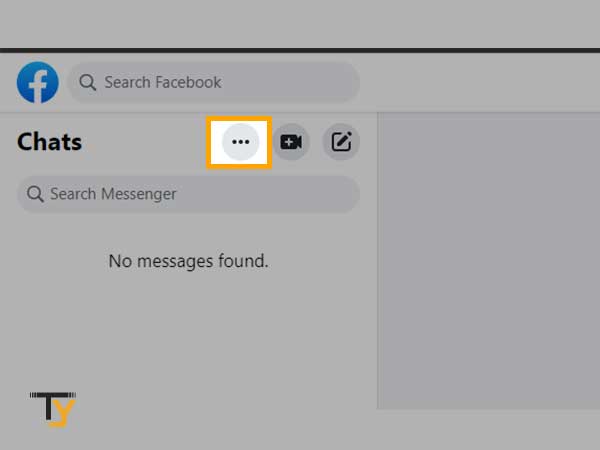
- Select the Archive Chats option.
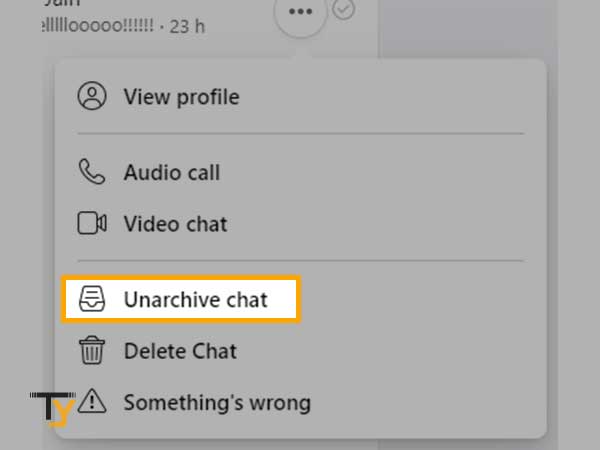
- In the Archived Chat list, hover over the chat, from which you want to recover deleted Facebook messages, and again click on the More menu icon.
- Lastly, select the Unarchive Chat option from the menu that appears.
Method-2: Download your Chat Data from Facebook
If you didn’t find your chat in the Archive Chat section, for which you want to retrieve the deleted Facebook messages, then this is the most efficient method that you can undergo to recover them.
Very few people know that they can download messages, posts, images, etc. from Facebook. In this method, you have to follow some steps to download your messages’ data in order to recover permanently deleted messages on Facebook Messenger.
Listed here are the steps that you need to follow while using different devices:
1. Using Android Facebook App
These are the steps that you have to follow to recover your deleted Facebook messages by downloading the required data:
- Tap on your Facebook app icon to open it up.
- Tap on the hamburger icon (three horizontal lines) to open the app menu.
- Scroll to the bottom of the Menu page and tap on the Settings and Privacy option.
- Under Settings and Privacy, select the Settings option.
- Thereafter, scroll down through the ‘Settings & Privacy’ page till you see the ‘Your Information’ section, within which you have to tap on the ‘Download your Information’ option.
- Inside the ‘Download your Information’ page, tap ‘Deselect All’ and select only the ‘Messages’ option.
- Then, scroll down till the end of the page, select the date within which you want to download your messages from the Date Range section.
- At last, tap on the Create File button at the bottom of the page.
2. Using iPhone/iPad Facebook App
In order to recover your deleted messages from Facebook Messenger on iPhone/iPad, these are the steps that you can follow:
- Open the Facebook Messenger app on your device.
- Tap on your profile picture present at the top corner.
- From the sidebar menu, select the ‘Account Settings’ option.
- Thereafter, you have to scroll down to the Account Settings page and tap on the ‘Download your Information’ option.
- On the next screen, you will see a list of Facebook downloadable data. To deselect them all, tap on the ‘Deselect All’ option.
- From the list, select the Messages option only.
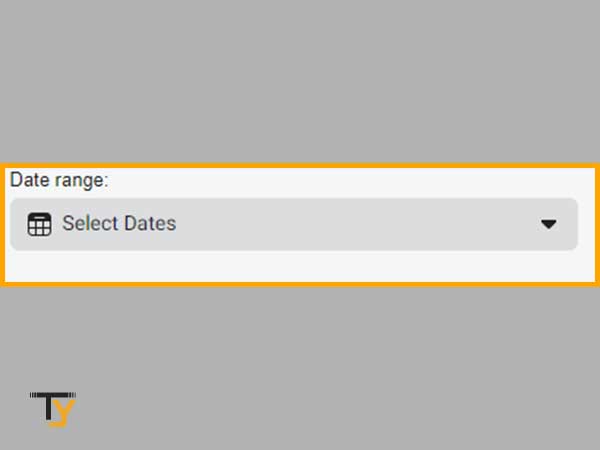
- Scroll down till the end, tap on the ‘Date range’ option and select the date within which you want to download the data.
- At last, tap on the Create File button.
3. Using a desktop
These are the steps that will take you along to download your messages’ data from Facebook, by which you might be able to see your permanently deleted messages:
- First, open your browser and log in to your Facebook account.
- On the homepage of your account, you have to click on the down arrow, present in the extreme right corner at the top of the page.
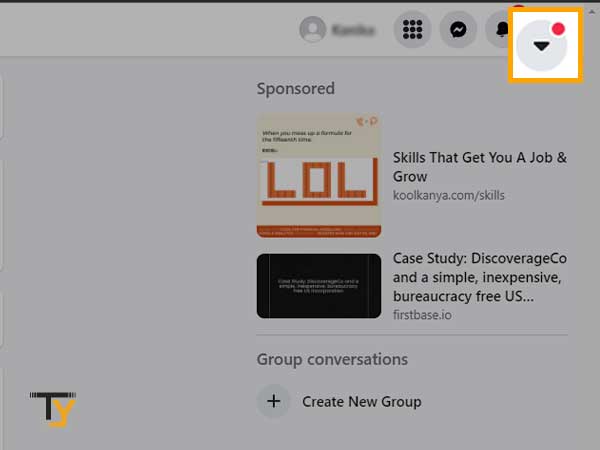
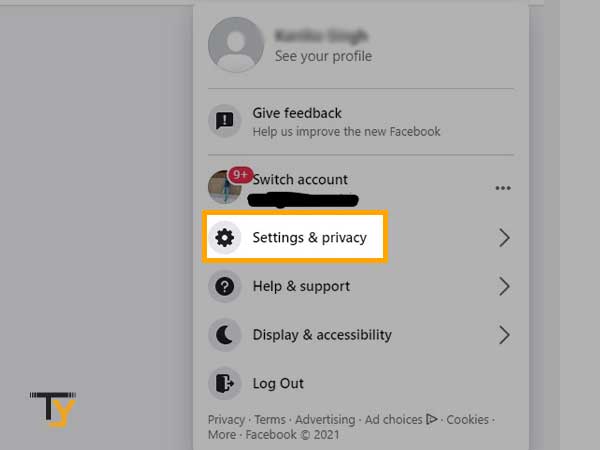
- From the drop-down menu, click on the Settings and Privacy option.
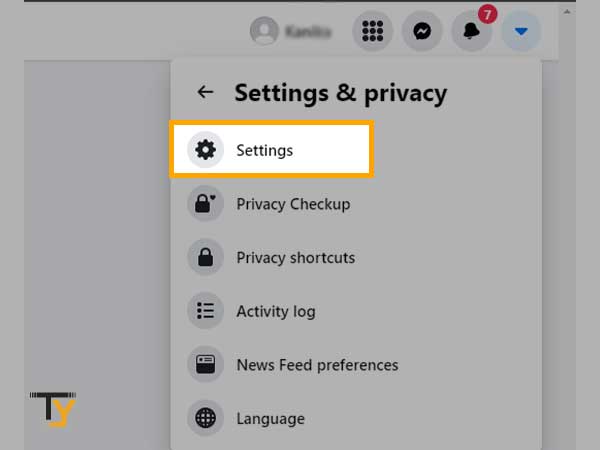
- Under Settings and Privacy, select the Settings option.
- From the sidebar of the page, click on the ‘Your Facebook Information’ option.

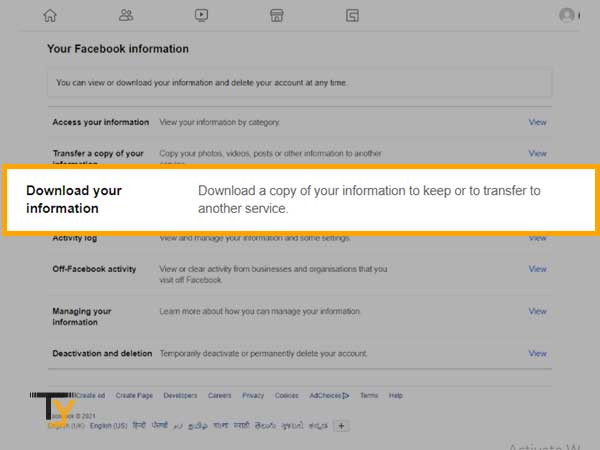
- Within the ‘Your Facebook Information’ page, select the ‘Download your Information’ section.
- On the next page, you will see a list of all the data items that you can download from Facebook. Since your concern is related to deleted messages, therefore, click on the Deselect All option, given in the top right corner of the list section.
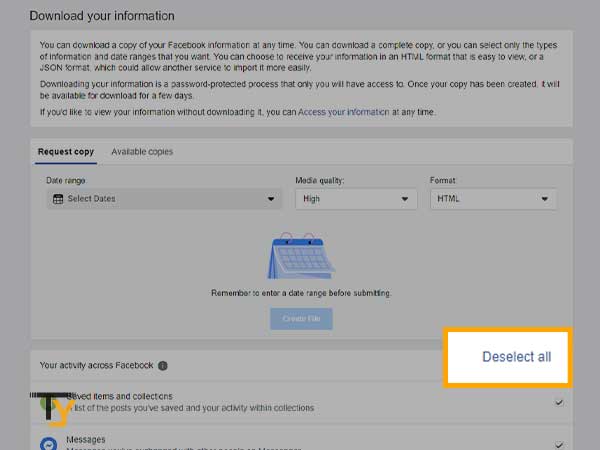
- Select the date, within which you want to recover deleted Facebook messages. If you do not remember the specific date, select the ‘All Time’ option in the Date Range section.
- Then, find and select the Messages option from the list.
- Lastly, click on the Create File option.
Notes
If you have a large amount of data to be prepared, then Facebook will take time to make a file of it. Therefore, you may have to wait for some time before the file is ready to download. Once it is ready, Facebook will notify you, and you can visit the same page to download it.
Method-3: Recover Deleted Messages from Facebook App Cache
Having hard luck? Didn’t get through the recovery of deleted Facebook Messenger messages by following the above methods? Don’t worry, here is another hit and trial method that may work.
In this method, you can recover deleted messages from Facebook Messenger by using the app cache stored in your phone’s memory. Mentioned below are the steps that will guide you through the process:
- First, you have to connect your Android phone to your PC using a USB cable.
- Open the folder of your phone (connected device name) visible in the ‘This PC’ folder.
- Within your phone’s folder, go to the SD Card or Internal Storage folder.
- There, click on the Android folder and open the Data folder present inside it.
- Inside the Data folder, search for ‘com.facebook.orca’ folder and double click to open it.
- Thereafter, inside the ‘com.facebook.orca’ folder, click open Cache folder and then open fb_temp.
- Inside, fb_temp you have to look for the Facebook Messenger permanently deleted messages that you want to recover.
Method-4: Check Email of Facebook Data Backup
If you have stored your Facebook data or have taken its backup in the past, then you can recover Facebook Messenger permanently deleted messages from that data.
When you create the backup of your data, all the files for which the backup has been created are sent to the email address that is linked to your Facebook account.
Therefore, you have to visit that email account, in the search bar of the inbox, type ‘Facebook’ and it will show all the emails received from Facebook. From the emails that appear, look for the one containing the backup data.
If you found that email, look for a message.html file, which contains all your chats in which you have taken part till the date of taking the backup. In this file, you might be able to see the messages that you have deleted.
Method-5: Ask the other recipient to provide the chat backup
If any of the above-mentioned methods don’t work for you to recover deleted Facebook messages from Messenger, then the last option that remains is to ask the other participant of the chat to provide you with the chat backup.
When you permanently delete a message from Facebook Messenger chat, then the messages get deleted only on your side, and they remain intact on the other side’s recipient. Therefore, you can ask him/her to send you your chat data.
There are two ways by which you can get your chat data:
- Ask for chat screenshots: You can ask the person to send you the screenshot of the chat that you want.
- Ask for message data: You can also ask the other person to provide you with the chat data for the particular day and date by downloading the message file from Facebook settings, as mentioned in Method-2 of this article. You can share this article with your friend and ask him/her to follow the steps mentioned in the 2nd method.
Bonus Tip-1: Should You Use Third-Party Apps to Recover Deleted Messages?
While searching for the method to recover your permanently deleted Facebook messages from Messenger, you must have come across many articles suggesting to download and use third-party apps to recover deleted Facebook messages or any other data.
But, the question is, are they genuine and ‘safe’ to use?
Safe is emphasized here because, in order to use these third-party applications, you are required to log in to them using your Facebook account credentials, which in my opinion, is a risky task. This is so because, when you log in using your Facebook login information, your username and password get stored in the database of third-party apps, which they might misuse for their own agenda or if the data is leaked, your FB account can get hacked.
Therefore, it is suggested to use only genuine methods and not rely on any third-party application for data recovery or any task.
Bonus Tip-2: Take backup of your Facebook data before permanently deleting anything
Facebook is a great application that has made a number of things possible when anyone couldn’t even think of them.
One very astonishing feature provided by Facebook, of which many are unaware, is taking backup of the Facebook data in the form of downloadable files. You can ask Facebook to provide you with the backup of your messages, posts, activities, pages, images, etc. Basically, anything you do on Facebook, you can have the backup for the same.
Therefore, it is advised, that before permanently deleting any chat or anything on Facebook, you should create its backup, so that when you require them in the future, you would instantly have something to look upon and can retrieve the deleted messages and other data, easily.
Following are the steps that you can follow to create backup files of your data:
- Login to your Facebook account by visiting its login page.
- Click on the drop-down menu icon (down arrow), in the top right corner of the screen, and select the ‘Settings & Privacy’ option from the menu.
- Then, click on the Settings option.
- Thereafter, the ‘Settings & Privacy’ page will appear, where you have to click on the ‘Your Facebook Information’ section.
- After that, select the ‘Download your Information’ option.
- Next, you will be directed to the page which will contain the list of items for which you can create a backup. Select messages, posts, images, or anything for which you want a backup.
- Now, in the ‘Date Range’ option, select the dates, between which you want the backup. You can also take the backup for all time data by selecting the appropriate option.
- Thereafter, click on the Create File button and the process of generating files of your data will begin.
Notes
Once the required data gets converted to files, you will get an email on the email account linked to your Facebook account or may get the notification for the same. You can revisit the same page and look for the download button to save the data on your device.